# DEEC (English)
# E-mail
# E-mail Client configuration
The generic parameters for configuring e-mail addresses with domain **@deec.uc.pt** are as follows
### Incoming settings
| **Protocol** | IMAP |
|---|
| Server Name | imap.deec.uc.pt |
|---|
| **Security** | TLS (SSL in case of Outlook) |
|---|
| **Port** | 993 |
|---|
| **Authentication Method** | *Password* (normal) |
|---|
| **User** | <your username> (for example, jferreira) |
|---|
| ***Password*** | <your password> |
|---|
| **Protocol** | SMTP |
|---|
| **Server Name** | smtp.deec.uc.pt |
|---|
| **Security**
| TLS (SSL in case of Outlook) |
|---|
| **Port** | 587 |
|---|
| **Authentication Method** | *Password* (normal) |
|---|
| **User** | <your username> (for example, jferreira) |
|---|
| ***Password*** | <your password> |
|---|
The webmail system is based on [Zimbra](http://www.zimbra.com/open-source "http://www.zimbra.com/open-source"), that has the following features:
- Self organizing folders
- Fast, advanced (in messages and attachments), writable, multi-folder searches
- Conversation view with multi-folder support
- Filters
- Full calendar
- Rich Web interface, multi-platform - browser and operating system
- Ubiquitous Access - Anywhere, Any Device
- Secure attachment access with no need for additional software
- Collaborative system based on modern technologies
You can access DEEC's webmail through [https://webmail.deec.uc.pt](https://webmail.deec.uc.pt/)
# Email Lists
### DEEC has a mailing list system, allowing you to quickly contact all your services and groups.
Technically, lists are supported by the software [Mailman](http://www.gnu.org/software/mailman/ "http://www.gnu.org/software/mailman/") and/or by the system [Zimbra](http://www.zimbra.com/open-source "http://www.zimbra.com/open-source"). For this reason, some lists have a moderation system, to reduce the spam sent to them, and the delivery of messages may be deferred.
See the list below for detailed information.
### DEEC
| **List** | **Recipients**
|
|---|
| All Users DEEC
allusers@deec.uc.pt
| All students, faculty and non-faculty collaborators in the department |
| Students
alunos@deec.uc.pt
| Actual Students of DEEC |
| DEEC Copy Center
*centrodecopias@deec.uc.pt* | DEEC Copy Center |
| Casa
*[casa@deec.uc.pt](https://informatica.deec.uc.pt/email/casa@deec.uc.pt "https://informatica.deec.uc.pt/email/casa@deec.uc.pt")* | Maria João |
| Non-Teaching Contributors
naodocentes@deec.uc.pt
| Non-Teaching Contributors |
| cientifica@deec.uc.pt | |
| Management
*direccao@deec.uc.pt* | Members of DEEC Management |
| Teachers
docentes@deec.uc.pt | DEEC Internal Teaching Collaborators |
| Teachers | Others
docentes.outros@deec.uc.pt | Other Teaching Collaborators |
| Teachers | All
docentes.todos@deec.uc.pt
| Teaching Collaborators (Internal and Other) |
| Erasmus
*erasmus@deec.uc.pt* | DEEC interlocutors by Erasmus |
| IT
informatica@deec.uc.pt | Computer Network Management (Streamline) |
| Helpdesk IT
*helpdesk@deec.uc.pt* | Computer Network Management (Streamline) |
| Info DEEC
*info@deec.uc.pt* | Secretariat, Management
|
| Labs
laboratorios@deec.uc.pt | Maria João Cavaleiro, Fábio Faria |
| manutencao@deec.uc.pt | Carlos Coelho, Augusto Figueiredo |
| Secretariat
secretaria@deec.uc.pt | Maria da Conceição Pereira, Ana Bernardes |
| *financeiros@deec.uc.pt
aprovisionamento@deec.uc.pt* | Aurora Gaspar |
| **Lista** | **Destinatários** |
|---|
| All Users INESC Coimbra
geral@inescc.pt | All members of the Instituto de Engenharia de Sistemas e Computadores de Coimbra |
| **Lista** | **Destinatários** |
|---|
| All Users ISR Coimbra
*allusers@isr.uc.pt* | All members of the Instituto de Sistemas e Robótica (Pólo de Coimbra) |
| **Lista** | **Destinatários** |
|---|
| **All Users IT Coimbra**
***allusers@co.it.pt*** | All members of the Telecommunications Institute (Coimbra Pole) |
| **Doctorates**
***doutorados@co.it.pt*** | Doctorates of the Instituto de Telecomunicações (All Poles) |
| **Doctorates de Coimbra**
***doutorados\_co@co.it.pt*** | Doctorates of the Instituto de Telecomunicações (Coimbra) |
| **Doctorates de Covilhã**
***doutorados\_cv@co.it.pt*** | Doctorates of the Instituto de Telecomunicações (Covilhã) |
| **Doctorates de Leiria**
***doutorados\_lr@co.it.pt*** | Doctorates of the Instituto de Telecomunicações (Leiria) |
| **Administrative Services (Coimbra Pole)**
***serv.adm@co.it.pt*** | Liliana Garanito, Henrique Silva, Vitor Silva |
If your email system administrator grants you mailing list management rights, you can manage your own mailing list management on the Zimbra system, available through the web interface at [https://webmail.deec.uc.pt](https://webmail.deec.uc.pt/).
To do this, simply go to Tab “Contacts”> “Contact Lists”> “Distribution Lists”.
You will then be allowed to make the following changes to the email list in question:
- Add and remove members;
- Change the title of the list;
- Choose whether the list should be visible or hidden in the global address book;
- List post or subscription permissions;
# General Description of the E-mail Service
DEEC provides all users - students, teaching staff and non-teaching staff - with an e-mail account.
The e-mail system is based on the [Zimbra ](https://www.zimbra.com/open-source-email-overview/ "https://www.zimbra.com/open-source-email-overview/")system, which has the following features:
- Freedom of customer choice
- Browser – Client Zimbra AJAX
- Cliente PC – Outlook (Online, Offline, Cached Mode), Apple Mail and iCal, Eudora, Evolution, Thunderbird/Sunbird, RSS, etc.
- Self-organizing folders
- Fast, advanced (in messages and attachments), recordable, multi-folder searches
- Conversation view with multi-folder support
- Filters
- Full schedule
- Rich cross-platform web interface - browser and operating system
- Ubiquitous access - anywhere, any device
- Secure access to attachments without the need for additional software
- Collaborative system based on modern technologies
The domains of the different types of users are as follows:
- Teaching and Non-Teaching Collaborators: @ deec.uc.pt
# Hardware
# Computer Labs
DEEC has a set of didactic laboratories, prepared with a set of workstations to support teaching activities, connected to the local network.
Computers, as an essential support tool, are equipped with the necessary software for the different subjects taught.
To this end, there are 8 laboratories, equipped with a total of 133 workstations, installed with Windows and / or Linux operating system, distributed as follows:
| **Initials** | **Laboratory** | **Nº of computers**
|
|---|
| LAI 1 | Laboratório de Apoio Informático 1 | 20 |
| LAI 2 | Laboratório de Apoio Informático 2 | 20 |
| LAI 3 | Laboratório de Apoio Informático 3 | 30 |
| LMI | Laboratório de Medidas e Instrumentação | 12 |
| LSD | Laboratório de Sistemas Digitais | 15 |
| LSRC | Laboratório de Sistemas e Redes de Computadores | 20 |
| LT | Laboratório de Telecomunicações | 5 |
| LH | Laboratório de Hiperfrequências | 5 |
A Data Processing Center, or Datacenter, is where an organization's data processing and storage equipment is concentrated.
They are usually designed to be secure and house servers and databases and file storage, processing large amounts of information.
In 2008, DEEC invested in the creation of a new Datacenter to improve the operating conditions of its information systems.
The Datacenter was designed from the ground up, consisting of several technical components:
- Power (including redundant power systems)
- Climatization
- Connectivity (Network)
- Servers
- Storage Systems
All of these components are mounted in a room protected against unauthorized access, with electrical and data cable routing mechanisms, metal enclosures (racks) where equipment is mounted and a fully controlled environment.
The climate control system is composed of a double redundant precision air conditioning system with constant monitoring, keeping the temperature constant and cooling the equipment. It has fault control and switching systems to extend their life, as well as to avoid problems in the event of individual component failure.
The power supply, in addition to operator power, uses large, rack-mounted uninterruptible power supplies (UPS) to keep equipment powered on even in the event of a power failure. Active equipment (servers, switches, etc.) is also purchased from redundant sources to guarantee alternative power supply paths in the event of individual component failure.
The Datacenter currently has the following approximate specifications: - 27 power supply circuits, totaling a maximum of 100A;
- 8 UPS with total capacity exceeding 20,000VA;
- 2 air conditioning systems with a total of 40,000 BTU;
- 8 switches, providing a total of 216 ports, with individual speeds of 1Gbps and 10Gbps in copper and fiber optic technology;
- Connection to 8 existing floor racks in the fiber optic building, with reductive paths;
- External fiber optic connection with a cumulative total of 10Gbps bandwidth;
- 55 physical servers;
- 43 virtual servers running on 4 hypervisors over SSD shared storage;
- More than 150 CPU cores and 1TB more RAM distributed across different servers;
- Total gross storage capacity greater than 24 TB on 2 storage systems;
In order to use the computer resources available at FCTUC's Department of Electrical and Computer Engineering (DEEC), you must know the network usage policy presented on this page.
These standards are in place to ensure the correct availability of resources for all users, protecting them from any problems caused by misuse of resources.
#### A) Users Rights and Duties
1. The accounts assigned to users are owned by DEEC;
2. Only students and collaborators of the University of Coimbra will be able to use one account;
3. Users are aware that their account is personal and cannot assign its use to third parties;
4. The user is responsible for servicing the machines, terminals and other network equipment they use;
5. The user is aware of the Computer Crime Law No. 109/91 published on 17 August 1991 which includes, among others, the following offenses:
- Tampering or sabotaging of data, programs or computer systems;
- Unauthorized access to computer networks and systems;
- Illegitimate interception of programs and / or data;
- Illegitimate reproduction and dissemination of programs;
- That any attempted infringement, even if not consummated, is equally punishable by law;
1. The use of other users' password interception software is prohibited;
2. You are prohibited from accessing or attempting to access other users' accounts;
3. The installation of software on the Department's equipment is prohibited, as well as the configuration / reconfiguration of external or internal equipment, without prior knowledge of the Computer Network Management Office (GRI);
4. It is forbidden to change the physical characteristics of the Department's equipment, as well as to change its location without prior knowledge of the GRI;
5. It is forbidden to use programs that result in DoS (Denial of Service) and consequent interruptions of services in the network;
6. The dissemination of any and all illicit content (including games, software and music, advertising, pornography, copyrighted content, viruses / worms, etc.) is prohibited through the use of DEEC accounts and / or the Department's network;
7. The use of P2P (peer-to-peer) software is prohibited;
8. It is the responsibility of users to ensure that their account is not used by third parties, so you should take steps such as logging out whenever you are away from a device, using a secure password, changing your password regularly and not transmitting it to you. the 3rd;
1. The user should avoid reaching the quota limits assigned in each system, making a good management of the contents of the account and its email;
2. The user should avoid spreading large files to a large group of users;
3. You should avoid using bandwidth-intensive software at peak times that may interfere with network performance and operation. In such situations, the GRI reserves the right to terminate ongoing proceedings without prior notice;
4. The user should avoid that his account is a means of spreading any and all spam;
5. The user should avoid using the DEEC account to register on websites that do not have an academic and / or professional purpose;
1. Temporary suspension of the user account if misuse occurs;
2. User account cancellation in cases of extreme severity;
3. Communication to the competent authorities of situations that result in the commission of a crime;
1. Verification of the correct use of resources and compliance with all the above indications is the responsibility of the GRI, which should be contacted if in doubt.
# Voice (IP)
#### Voice over IP Service
DEEC has a voice over IP infrastructure that has replaced the previous analog voice infrastructure.
This service is integrated in the infrastructure of the University of Coimbra, making it possible to make internal calls between buildings and departments within it.
The prefix for DEEC is 42. Thus, all previous local extensions of DEEC went from the previous 4 digits to 6. For example, the old extension 1245 in the VoIP system becomes 421245.
You can always check the phone book at:
[http://web.deec.uc.pt/telefones](http://web.deec.uc.pt/telefones)
#### Equipment
The installed terminal equipments are all SNOM 300 / SNOM 710 and have a set of modern features for user comfort:
- Call Forward
- Two input lines
- Two output lines
- Caller ID
- Address Book
-
- Best sound quality
- Ringtone Customization
- Outgoing Call Log
- Missed Call Log
- Call Rejection
- Conferences
#### Call Costs
| **Zone** | **Cost (euro) / minute** |
|---|
| Fixo Local | 0,0070 |
| Fixo Nacional | 0,0070 |
| Prefixo “96” | 0,0200 |
| Prefixo “922” | 0,0200 |
| Prefixo “924” | 0,0200 |
| Prefixo “925” | 0,0200 |
| Prefixo “926” | 0,0200 |
| Prefixo “927” | 0,0200 |
| Prefixo “91” | 0,0280 |
| Prefixo “921” | 0,0280 |
| Prefixo “929” | 0,0280 |
| Prefixo “93” | 0,0300 |
| Fixo-móvel nacional 31 | 0,0450 |
| Nómada | 0,0070 |
| Fixo Espanha | 0,0145 |
| Fixo Europa Zona 18 | 0,0121 |
| Fixo Restante Europa | 0,0290 |
| Fixo EUA e Canadá | 0,0121 |
| Fixo Brasil e Venezuela | 0,0218 |
| Fixo Restante América | 0,1557 |
| Fixo Marrocos | 0,0192 |
| Fixo África Zona 115 | 0,1090 |
| Fixo Restante África | 0,1557 |
| Fixo Austrália | 0,0178 |
| Fixo Resto do Mundo | 0,1175 |
| Móvel Europa Zona 120 | 0,0560 |
| Móvel Restante Europa | 0,0970 |
| Móvel EUA, Canadá, Brazil e Venezuela | 0,1570 |
| Móvel Restante América | 0,1420 |
| Móvel África Zona 125 | 0,1220 |
| Móvel Restante África | 0,2236 |
| Móvel Austrália | 0,1126 |
| Móvel Resto do Mundo | 0,1175 |
| Satélite | 1,9989 |
*Date: 4/4/2012 (Valid until 2015, subject to annual review)*
- [Guia Rápido - Snom 710\_final.pdf](https://helpdesk.deec.uc.pt/api/v1/attachments/11449)
- [UM\_snom3xx\_V2.2\_en.pdf](https://helpdesk.deec.uc.pt/api/v1/attachments/11448)
# Network Time Protocol (NTP)
The NTP service is intended to synchronize the time between the various network devices. The Computer Network Management (GRI) office maintains a time reference (ntp.deec.uc.pt), synchronized with the central time servers of the University of Coimbra and other higher level references. The devices you want can sync with this local reference to keep your watch constantly updated and in sync.
To access the service, users must configure the device's NTP client by pointing to the ntp.deec.uc.pt (or 193.136.205.254) server.
# Security
# Authentication and Account Password
DEEC has a centralized authentication system, that is, a unique identification system, which allows all its users to access the various informed services, using the same authentication credentials - the same username and password.
Data or degree of criticality of this keyword, which allows access to multiple computer services, were used according to the following rules:
- A keyword must have at least eight characters and three different variants (uppercase, lowercase, numbers and punctuation);
- The password must be renewed periodically by the user;
You can change your password at [https://password.deec.uc.pt](https://password.deec.uc.pt/ "https://password.deec.uc.pt")
# Department access
Access after hours
Access to the Department, outside normal operating hours, is done through a biometric system.
The following groups may require this type of access:
- Master's thesis students;
- Erasmus students;
- graduate students;
- PhD students;
- DEEC-based student organizations (NEEC, BEST,?);
- students representing the respective course with the Coordinator;
- researchers;
- employees;
- student-researchers;
- others on reasoned request;
- internal and external teachers.
Procedure:
1º) Access the form through the following [address](https://docs.google.com/forms/d/e/1FAIpQLSdvDWJlJ81cypX3quiZbdClysEt0hlqw9qTYy6h6DGEiWSpHw/viewform "https://docs.google.com/forms/d/e/1FAIpQLSdvDWJlJ81cypX3quiZbdClysEt0hlqw9qTYy6h6DGEiWSpHw/viewform");
2º) Fill it in according to the instructions;
3º) Wait for a reply via e-mail, where you will be contacted to go to the Computer Network Office, in case I do not have access registration in the department yet.
# Services
# My DEEC
The My Deec platform is an evolutionary information system, with internal support for the department's activities, accessible by students, teaching and non-teaching staff, comprising the following major areas of functionality (available depending on the privileges of each user):
- Academics
- Documentation Archive
- Contacts
- Building
- Image & Communication
- Computing
- Inventory
- Organic
- Secretariat
You can access this system through the address (URL):
[https://my.deec.uc.pt](https://my.deec.uc.pt/)
The login on the system is the e-mail address and the password is the one used on the respective e-mail account.
# Personal Page Hosting Service
DEEC provides its employees with a service for the publication of personal web pages, for their enjoyment. This service is available through the URL [http://home.deec.uc.pt/~username](http://home.deec.uc.pt/~username).
The materials hosted through this service are the responsibility of each user and reflect their individual vision. The information published does not represent the opinion or policy of the Department, Faculty or University of Coimbra. Thus, the institution should not be associated with the users' view, expressed in the pages hosted on this service.
#### Personal Website Management
The access to the server, for editing the pages, is done through the FTP TLS / SSL protocol and your DEEC credentials.
The table below shows the settings that you should use in your usual TLS / SSL FTP client (we suggest [Cyberduck](https://cyberduck.io/ "https://cyberduck.io/") for OSX and Windows). Click [here ](https://helpdesk.deec.uc.pt/help/en-us/11-information-systems/22-connection-to-web-and-home-servers-via-ftp-tls-ssl "https://helpdesk.deec.uc.pt/help/en-us/11-information-systems/22-connection-to-web-and-home-servers-via-ftp-tls-ssl")for more complete instructions.
| **Definition** | **Description** | **Value to be configured** |
|---|
| Server | Address of the server hosting the home.deec.uc.pt | home.deec.uc.pt |
Protocol | Protocol for interaction with the server, for manipulating remote | FTP TLS/SSL Explicit encryption |
| Username | Username of the user to be connected to the server | DEEC domain username (e.g., userx)
|
| Password | Password of the user to be connected to the server | Password of the respective account |
| Path
| Path in the file system, where the site is hosted | /home/*<username>*/public\_html |
The website must be contained in a folder, named public_html, within your account. If it is not yet created, you must proceed with its creation.
In addition, you must ensure that the folder and all files contained have the correct permissions (755 - u = rwx, g = rx, o = rx), using the command below, using the SFTP client:
```
chmod -R 755 /home//public_html
```
####
#### Previous Systems
Forwarders of previously published URLs have been created to ensure their smooth operation. Thus [http://www.deec.uc.pt/~username](http://www.deec.uc.pt/~username) and [http://www2.deec.uc.pt/~username](http://www2.deec.uc.pt/~username), automatically point to [http://home.deec.uc.pt/~username](http://home.deec.uc.pt/~username).
The sites were automatically copied from the old server (THOR). If for some reason you were using the ISO-8859-1 encoding and your page contains unformatted characters, you can create an .htaccess file, with the following content, / home / <username> / public_html, to solve the problem:
To use this service you need a @deec.uc.pt or @student.uc.pt account
1 - Download and install Cyberduck. To download it click [here ](https://cyberduck.io/ "https://cyberduck.io/")(select Windows or Mac OSX).
2 - Open Cyberduck, click on Open Conection, select SFTP (SSH File Transfer Protocol) and then fill in the fields according to the image, using your username and respective password
[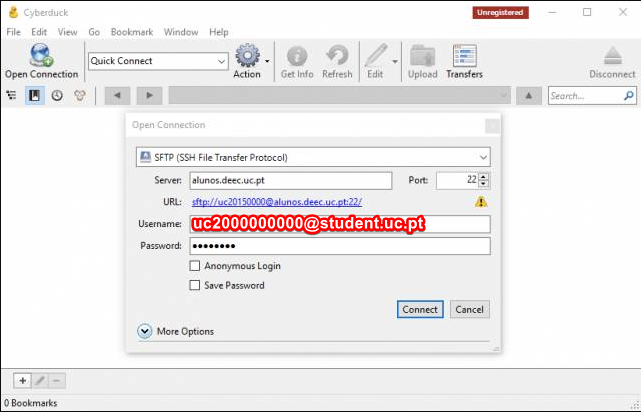](https://kb.deec.uc.pt/uploads/images/gallery/2023-02/image-1676563467616.png)
3 - Click on Allow in the next window.
4 - After the connection is established, you can start transferring files between the server and your machine.
To use this service, you need to own a @deec.uc.pt account!
This document presents the necessary steps to access via FTP TLS / SSL the servers web.deec.uc.pt and home.deec.uc.pt.
1 - Download and install Cyberduck. To download it click [here ](https://cyberduck.io/ "https://cyberduck.io/")(select Windows or Mac OSX).
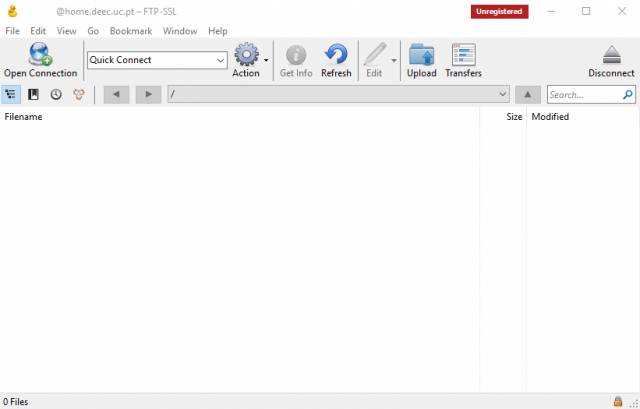
2 - Open Cyberduck, click on Open Connection, select FTP-SSL (Explicit AUTH TLS) and then fill in the server address, as well as your user and password

3 - After the connection is established, you can start transferring files between the server and your machine
# MIPS Server
To use this service you need a @deec.uc.pt or @student.uc.pt account!
The DEEC has a server based on the MIPS architecture that run an appropriate LINUX distribution.
To connect to the server and transfer files you need to use “ssh” (secure shell) and “sftp”, respectively. If you are a Linux / Mac user, to connect to the server, run the command:
**$ ssh ‘uc20YYXXXYYY@student.uc.pt’@mips.deec.uc.pt**
and you will have access to the MIPS machine, whether inside or outside the DEEC LAN. You must use the credentials associated with the University's account (Inforestudante). According to the Computer Network Office, the first time you try to enter the server it will fail and the account will be created. You should cancel the operation (CTRL + C), try again and you will be able to access the server.
If you are a Windows user, you must install free “ssh” and “sftp” clients. A suggestion is to use MobaXterm ([https://mobaxterm.mobatek.net/)](https://mobaxterm.mobatek.net/)) which allows you to have both clients in one program. These clients do exactly the same as the Linux / Mac commands mentioned above, but using a windowed interface.
After installing and running MobaXterm, to connect to the server you must do the following steps:
1. Press the Session button in the upper left corner
[](https://kb.deec.uc.pt/uploads/images/gallery/2023-02/image-1676559732295.png)
2. A new window should be opened with the title Session Settings that suggests choosing the type of session you want. You should press SSH
[](https://kb.deec.uc.pt/uploads/images/gallery/2023-02/image-1676559755873.png)
3. Fill in the empty fields with the following data:
[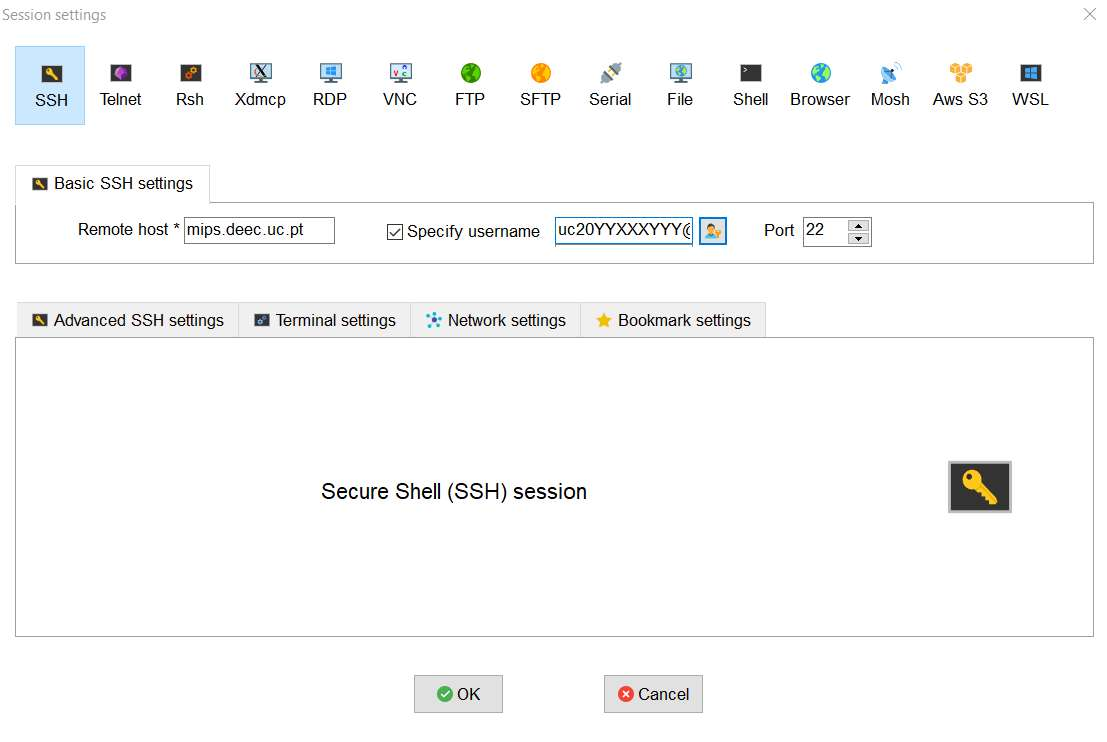](https://kb.deec.uc.pt/uploads/images/gallery/2023-02/image-1676559764347.png)
Remote Host must be mips.deec.uc.pt, select Specify username and fill in the credentials associated with the University account (Inforestudante) uc20YYXXXYYY@student.uc.pt. Clicking Ok will open a command on the console to enter the password associated with your account. If you filled in your data well, an option to save credentials will appear, allowing you to avoid having to enter a password for future access.
**Notes:**
\- Only save your credentials if you are working on your personal computer.
**- According to the Computer Network Office, the first time you try to enter the server it will fail and the account will be created. You should cancel the operation (CTRL + C), try again and you will be able to access the server.**
4. If you have logged in correctly, you will now have access to the ssh client (console) and sftp (file explorer on the left). To send files to the server just drag them to the sftp client zone. You can also create new files by right clicking on the sftp client area and selecting New empty file.
# Software
# Microsoft Imagine
To use this service, you need to own a @deec.uc.pt account!
Microsoft Imagine is a protocol that Microsoft signs with the Departments of Universities that teach disciplines in the STEM (Science, Technology, Engineering and Mathematics) areas that gives FREE access to its students, teachers and employees of the Department to Microsoft tools.
The protocol can be used through a Web based platform. In this way, it is possible for the community to obtain a personal copy of all available software, with a personal account for each user. The software delivery process is automated, freeing those responsible / administrators to essentially manage the painful process of assigning the unique Keys to which each user is entitled to obtain their personal copy of the software. On the part of users, access to the software becomes available uninterruptedly, at any time and in any place, as long as they are registered in the system. The fact that each student has their own personal account gives them full access to “their” software, being able to access their Product Keys at any time or order new software products.
#### Who has access?
- DEEC students, who attend courses in the current academic year;
- Teachers;
- Contributors;
#### Microsoft Imagine Accounts
Access to Microsoft Imagine is dependent on the creation of accounts by the management of the DEEC Computer Network (GRI).
For this purpose, the GRI creates the accounts as follows:
- For students, at the beginning of each academic year;
- For teachers and collaborators, when creating the departmental account;
At that moment, each user receives an email, in the institutional email account, automated by the platform, with the initial access instructions to the platform.
Accounts on the Dreamspark platform are independent of departmental accounts, with no connection to DEEC's centralized authentication services. For this reason, they may have a different password.
#### Platform Access
The username is the institutional email address.
The password is, as already mentioned, generated by Microsoft, and is automatically sent in the initial email.
If you have lost or do not know your password, you can recover it on the Microsoft Imagine authentication page (“Sign In”), using the following options:
“Forgot you password?” - This option sends the user a new password.
The address (URL) for accessing the platform is:
[http://web.deec.uc.pt/go/dreamspark](http://web.deec.uc.pt/go/dreamspark)
#### Rules of Use
- The available software can be used in academic projects, classes, research, group work or departmental projects of the faculty;
- Students covered by the protocol will be able to install the software on their personal machines, as long as they are only for their own use and only for academic purposes;
- The use of tools obtained by students under the protocol is authorized, even after leaving or finishing the course, only for academic or research purposes;
- The installation of Microsoft Windows or other operating systems made available, can only be carried out on PCs without a pre-installed system (OEM) for academic purposes and for the student's own use, and the operating system cannot be transferred in case of computer transfer. ;
- The student can save A SINGLE copy of the software provided, when it is provided in the * .ISO format;
#### Incorret Use
- The use of the tools available for the development of products that are not of academic and / or research scope;
- The installation of the operating systems made available for the use of other software not covered by the protocol that runs on them;
- The use of the software made available for commercial purposes;
- The software provided cannot be rented, sold, transferred or transferred to third parties, whether they are (for example) other departments, other students, companies or consultants;
# Microsoft Office 365 Education
### Presentation
Office 365 Education Plus for students is available free of charge to students and employees enrolled at the University of Coimbra.
Install Office on a maximum of 5 PCs or Macs and on other mobile devices, including Android ™, iPad® and Windows tablets.
-
Students (use your address @ students.deec.uc.pt or @ student.uc.pt for registration)
- Teachers (use your address @ deec.uc.pt for registration)
Create reports and presentations with the latest versions of the applications you know so well and trust. It includes Word, Excel, PowerPoint, OneNote, Outlook, Publisher and Access.
Work with your colleagues online and see each other's changes in real time with Office Online and OneDrive. The time for exchanging emails with outdated versions is a thing of the past.

The JMP Software is available to the entire academic community, a program designed to support activities in statistics and data science, from the planning of experiences to the visualization and analysis of large volumes of information, predictive analytics, Quality engineering, reliability and maintenance.
As a result of an agreement between Social Action Services and the University of Coimbra, the software is made available by the technicians responsible for the computer service of the various Organic Units / Faculties.
Please select the operating system to install:
To support teaching activities, DEEC has a set of laboratories equipped with work stations. On these computers, a set of software called Base Software is installed, which is installed on all. In addition, other software is also installed, specific to the activities of each laboratory at each moment and the subjects taught there.
On this page, you can consult at all times which base software is installed in all laboratories and which software is installed in each laboratory.
In case it is necessary, teachers can request the installation of additional software in the laboratories, through the Helpdesk service. At the beginning of each semester, orders must be placed with additional advance, since they are times with high requests.
## Base Software
#### Windows
| **Software** | **Function** | **License** |
|---|
| 7Zip | (Des)Compressing File | Freeware |
| Adobe Reader | Viewing PDF files | Freeware |
| CDBurner XP | Burning Optical Disks | Freeware |
| CutePDF | Generation of PDF Files | Freeware |
| ESET Nod32 | Anti-virues | Comercial |
| Google Chrome | Web Browser | Freeware |
| Java JRE | Runtime Java | Freeware |
| Mozilla Firefox | Browser Web | Freeware |
| Microsoft Office | Office Productivity | Comercial |
| Notepad++ | Editing text files | Freeware |
| Putty | SSH Client | Freeware |
| WinSCP | Browser Ficheiros SFTP/SSH | Freeware |
| VLC Media Player | Media Player | Freeware |
#### Linux
| **Software** | **Function** | **License** |
|---|
| Geany | Editing text files | Freeware |
| GCC | Software Compiler C/C++ | Freeware |
###
## Aditional Software
#### LAI 1
LAI1, located at Tower T, Floor 6, has the following specific software installed:
| **Software** | **Function** | **License** |
|---|
| QT Creator | Integrated Development Environment | Freeware |
| Matlab | High-level language for engineering | Comercial |
| MySQL Workbench | Database management | Freeware |
| Visual Studio Professional | Development environment | Comercial |
#### LAI 3
LAI3, located in Tower S, Floor 4, has the following specific software installed:
| **Software** | **Function** | **License** |
|---|
| Kinect for Windows | API for Kinect systems | Comercial (protocol Matlab TAH) |
| Labview | Development of commercial measurement and control systems | Comercial |
| Matlab | high-level language for commercial engineering | Comercial (license Matlab TAH) |
| MySQL Workbench | Database management | Freeware |
| Softkinetic API | API for SofKinetic systems | Freeware |
| Codeblocks | Development environment | Freeware |
| Visual Studio Professional | Development environment | Comercial (licenseMicrosoft Dreamspark) |
#### LSRC
LSRC, located at Tower R, Floor 6, has the following specific software installed:
| **Software** | **Function** | **License** |
|---|
| Matlab | high-level language for commercial engineering | Comercial |
| Quartus II Web Edition | Design of FPGA and CPLD | Freeware |
| Riverbed | Simulation of data networks | Freeware |
####
LSD
LSD, located at Tower R, Floor 6, has the following specific software installed:
| **Software** | **Function** | **License** |
|---|
| Matlab | high-level language for commercial engineering | Comercial |
| Quartus II Web Edition | Design of FPGA and CPLD | Freeware |
| Visual Studio Professional | Development environment | Comercial (licenciamento Microsoft Dreamspark) |
| Codeblocks | Development environment | Freeware |
| MySQL Workbench | Database management | Freeware |
####
LPDS
LPDS, located at Tower S, Floor 5, has the following specific software installed:
| **Software** | **Function** | **License** |
|---|
| Matlab | high-level language for commercial engineering | Comercial |
| Blender | 3D Modeling Program | Freeware |
| QT Creator | Integrated Development Environment | Freeware |
| Eclipse | Development platform | Freeware |
| Codeblocks | Development environment | Freeware |
| Labview | Development of measurement and control systems | Comercial |
| MySQL Workbench | Database management | Freeware |
| Visual Studio Profissional | Development environment | Comercial (license Microsoft Dreamspark) |
####
LMI
LMI, located in Tower S, Floor 5, has the following specific software installed:
| **Software** | **Function** | **License** |
|---|
| Matlab | high-level engineering language | Comercial |
| Visual Studio Profissional | Development environment | Comercial (licenciamento Microsoft Dreamspark) |
| MySQL Workbench | Database management | Freeware |
| Codeblocks | Development environment | Freeware |
| Labview | Development of measurement and control systems | Comercial |
####
LT
LT, located at Tower S, Floor 6, has the following specific software installed:
| **Software** | **Function** | **License** |
|---|
| Matlab | high-level engineering language | Comercial |
| Wireshark (c/WinPcap) | Protocol analysis tool | Freeware |
| Riverbed | Simulation of data networks | Freeware |
####
LC
LC, located in Tower S, Floor 3, has the following specific software installed:
| **Software** | **Função** | **Licença** |
|---|
| Matlab | high-level engineering language | Comercial |
| MySQL Workbench | Database management | Freeware |
| Visual Studio Profissional | Development environment | Comercial (license Microsoft Dreamspark) |
####
LH
LH, located at Tower S, Floor 6, has the following specific software installed:
| **Software** | **Function** | **License** |
|---|
| Matlab | high-level engineering language | Comercial |
| Labview | Development of measurement and control systems | Comercial |
| MySQL Workbench | Database management | Freeware |
| Visual Studio Profissional | Development environment | Comercial (license Microsoft Dreamspark) |
| Codeblocks | Development environment | Freeware |
# Desktop Virtualization (VDS) @ LAI3
To use this service you need a @deec.uc.pt account!
#### Introduction
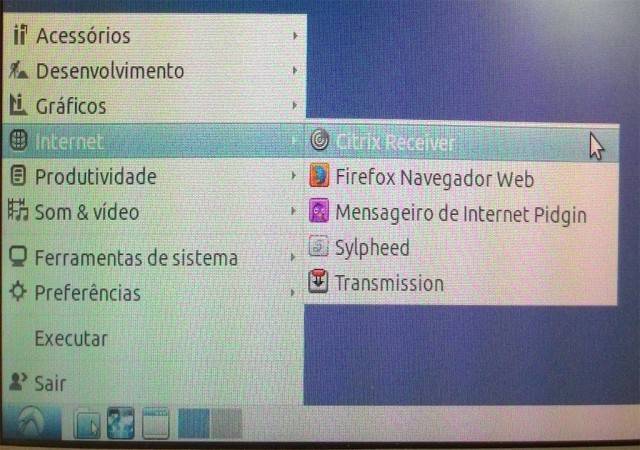
The first step will be to open the Lubuntu "Start" menu, select "Internet" and open the "Citrix Receiver":
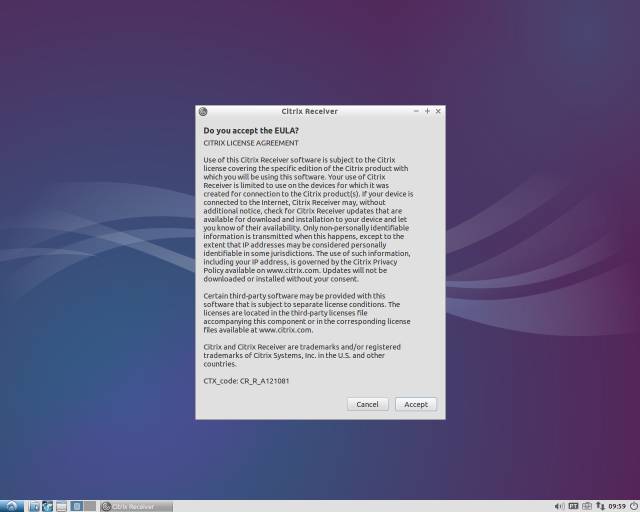
The software will start.
You must enter the following server address: vds.deec.uc.pt
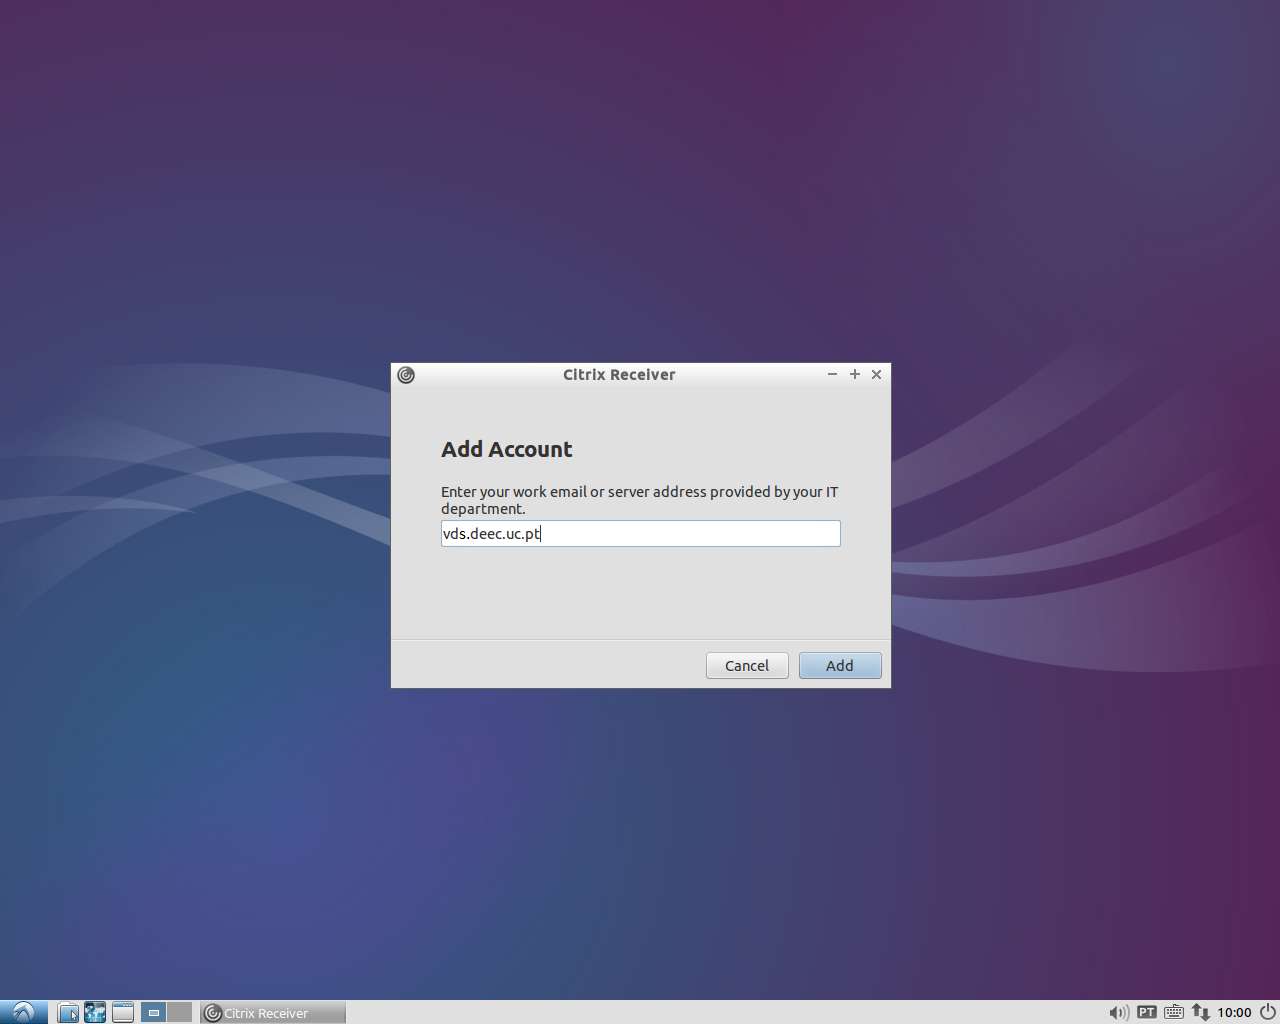
You must complete your DEEC credentials
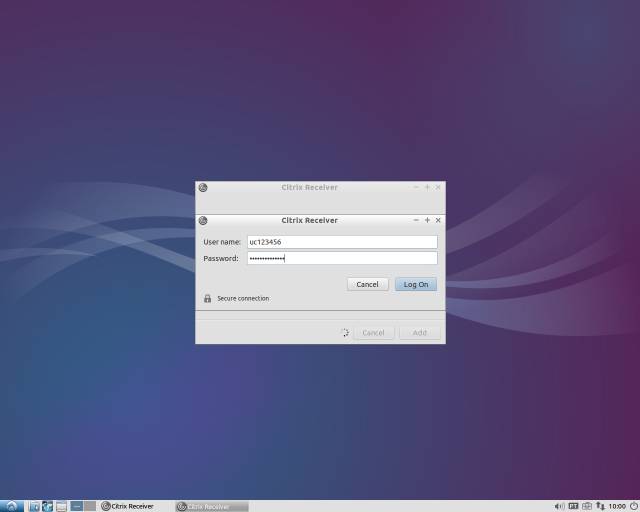
Authentication to the VDS system is now complete.
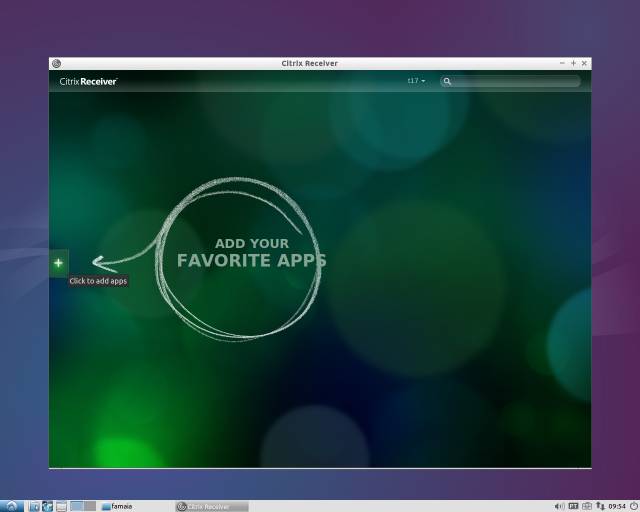
Click on the “+” to add access to the Virtual Desktop:
Go to "All Apps" and select "Windows 8/10":
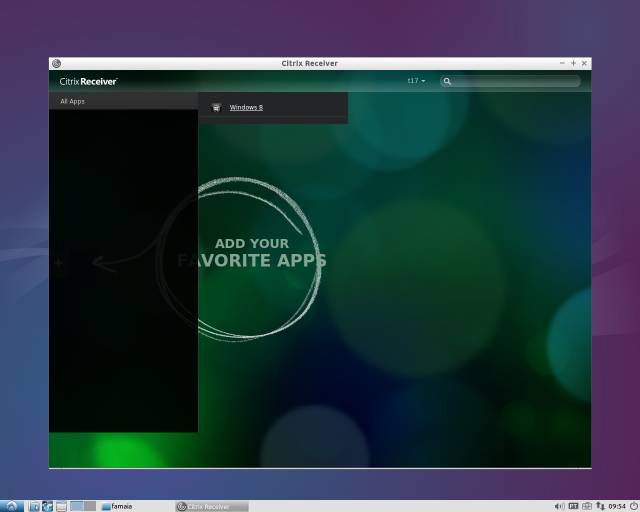
Click on the icon and the Virtual Desktop with Windows 8 will start.
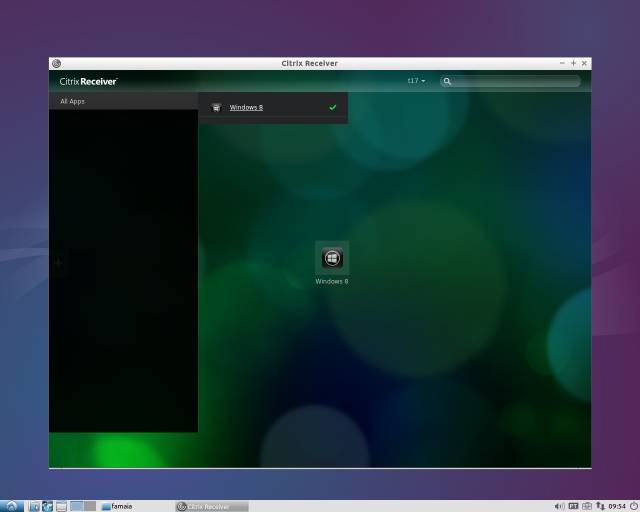
Wait a moment for the working session to become available.
To use this service you need a @deec.uc.pt or @uc.pt account!
#### 1. Create a MathWorks account (If you already have a MathWorks account you can skip this step)
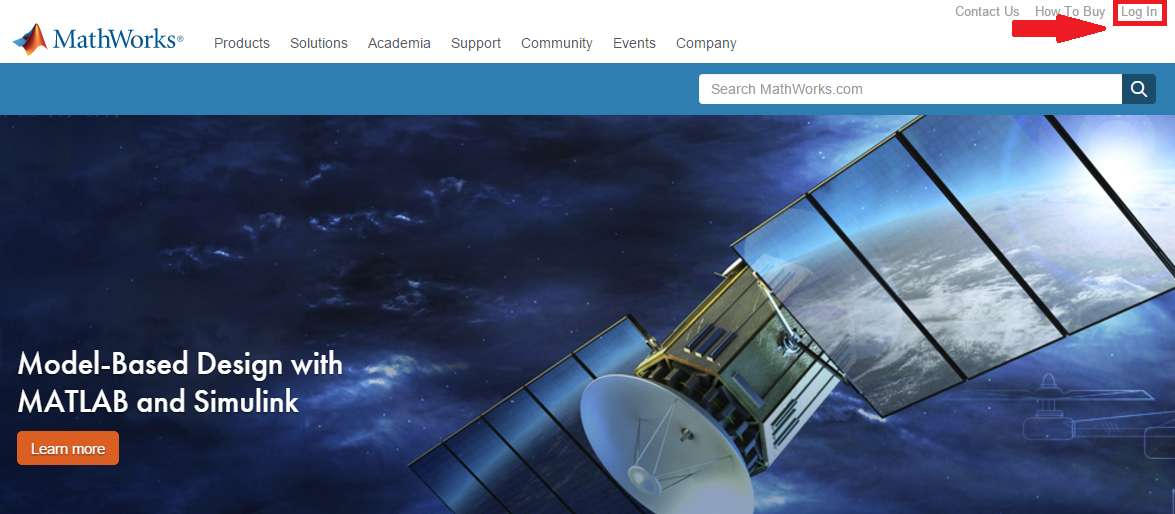
• Go to [http://www.mathworks.com](http://www.mathworks.com/) and click on *“Log in”.*

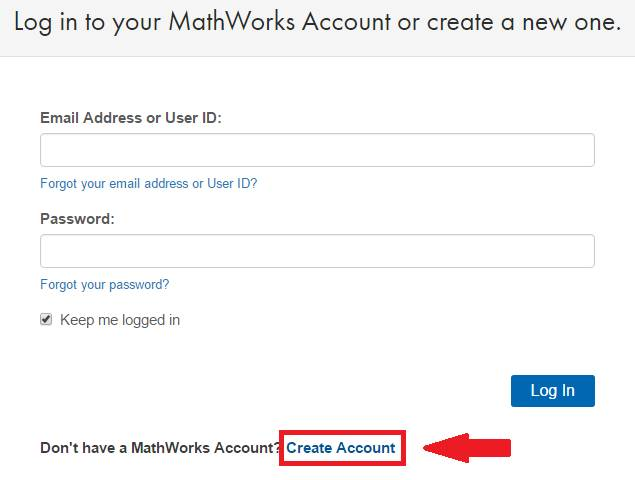
• Click on “Create Account”.

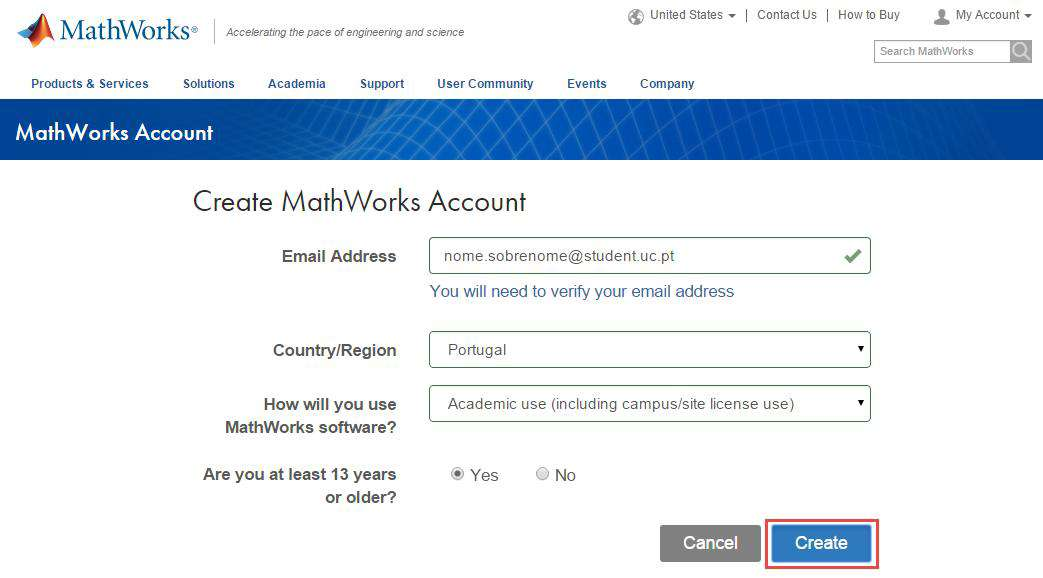
• You must use your institutional email (@ [deec.uc.pt](http://deec.uc.pt/ "http://deec.uc.pt") or @ [uc.pt](http://uc.pt/ "http://uc.pt")) and select the option “Academic Use”.

• At this point, you can finish creating your MathWorks account.

### 2. Associate the MathWorks account with the license
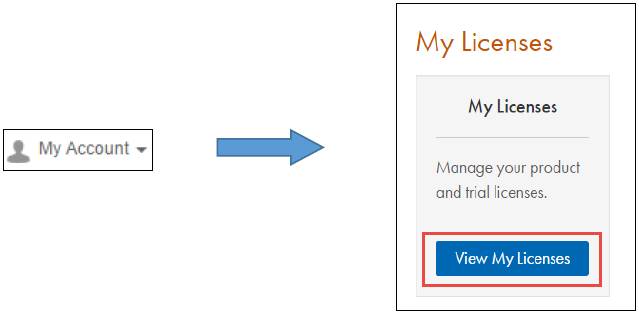
• After logging into your MathWorks account, go to “My Account” and click on “View My Licenses”.
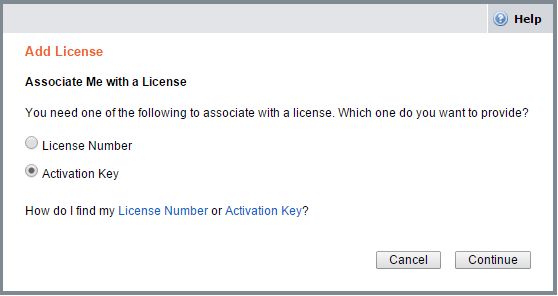
• Click on the “Add License” button

• Select the “Activation Key” option and click “Continue”.
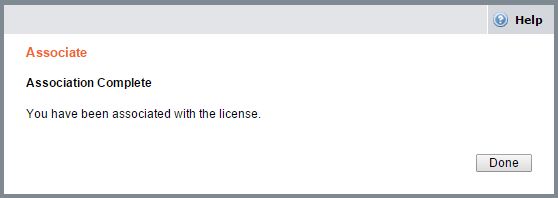
• Enter the Activation Key: 18583-36985-43947-39097-18102 and click on “Continue”.
### 3. Download and / or install the Software
You can download the software from the Mathworks website (method b), however we suggest and recommend that you choose to install it directly or download it from the local BOX server (method a), the process being much faster, since it only uses the local network.
- [Windows](https://drive.deec.uc.pt/d/s/pYApj2fV6CTwNvJn9kmwDexPVDmWrQ3P/W7NHLPuSS7VwYoxtK7SYqSIVw4jt1kjb-Q79A1QBGrwk)
- [Linux](https://drive.deec.uc.pt/d/s/pYAhzbbbs2YpZzMN6gicovRS7UoSBS0W/-2QN1fizStZ4Uu1cXnTO4ZAeIYtFlbDa-erig4gpGrwk)
- [macOS](https://drive.deec.uc.pt/d/s/pYAquBDU0soePfNDmo1LiiM1Ka3kkyPs/qJR-uDFohe0c7g1CHL17XJhIcJxfmDJv-IrPgPBdGrwk)
METHOD B - TRANSFER VIA THE MATHWORKS WEBSITE (ALTERNATIVE)
a. When the license is activated in your MathWorks account, go to:
Alternatively, you can download the software from the address ...
• Select the version of the software you want to install.
• Select the platform:
• Choose the newly activated license and click “Next”.
To use this service you need a @student.uc.pt account
### 1. Create a MathWorks account (If you already have a MathWorks account you can skip this step)
• Go to [http://www.mathworks.com](http://www.mathworks.com/) and click on *“Log in”.*
[](https://kb.deec.uc.pt/uploads/images/gallery/2023-03/image-1678460775170.png)
• Click on “Create Account”.
[](https://kb.deec.uc.pt/uploads/images/gallery/2023-03/image-1678460784456.png)
• You must use your institutional email (@student.deec.uc.pt) and select the option “Academic Use”.
[](https://kb.deec.uc.pt/uploads/images/gallery/2023-03/image-1678460810603.png)
• At this point, you can finish creating your MathWorks account.
[](https://kb.deec.uc.pt/uploads/images/gallery/2023-03/image-1678460826699.png)
2. Associate the MathWorks account with the license
You can download the software from the Mathworks website (method b), however we suggest and recommend that you choose to install it directly or download it from the local BOX server (method a), the process being much faster, since it only uses the local network.
- [Windows](https://drive.deec.uc.pt/d/s/shHWlxPCRCHy4JWaAFatNuvCzX9PIO4g/F3M2Gbr8C7V3gYY8-hd_zCDDjGt7RBP7-l7iAwQuvRgo)
- [Linux](https://drive.deec.uc.pt/d/s/shHQTBR4CShos1mXlLfeTcxdsgxvxZpK/Uu2V9RRI5VjW9jLdRtrjONpFWypAoyaH-wbiABRSvRgo)
- [macOS](https://drive.deec.uc.pt/d/s/shHYIK2Lw0fWwJ0RYAzSvZYfXcXixLHM/bZbRbg0xbdMgztUB4QrKsGBfG0AMRbZ_-JrlgkSKvRgo)
a. When the license is activated in your MathWorks account, go to:
Alternatively, you can download the software from the address ...
• Select the version of the software you want to install.
• Select the platform:
• Choose the newly activated license and click “Next”.
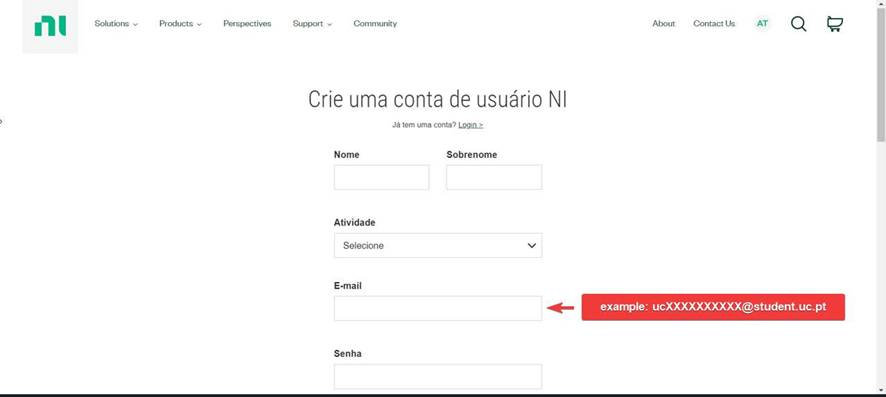
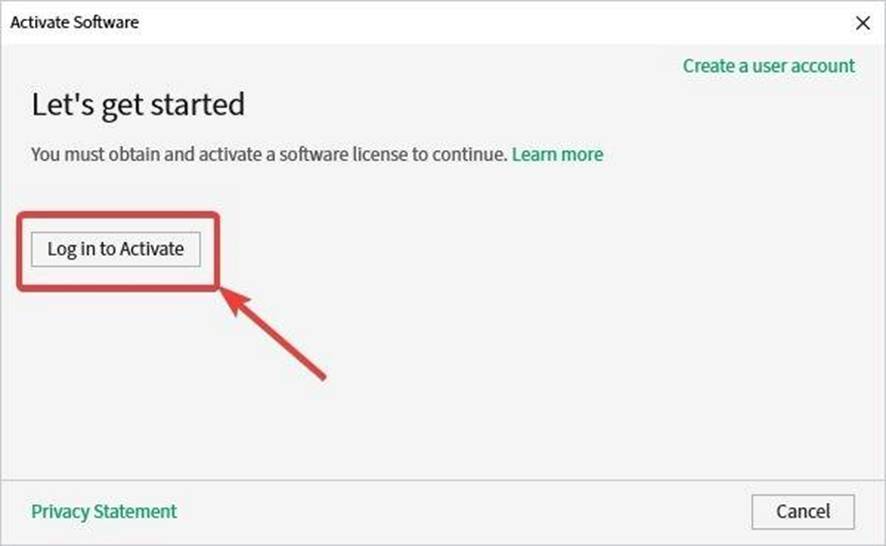
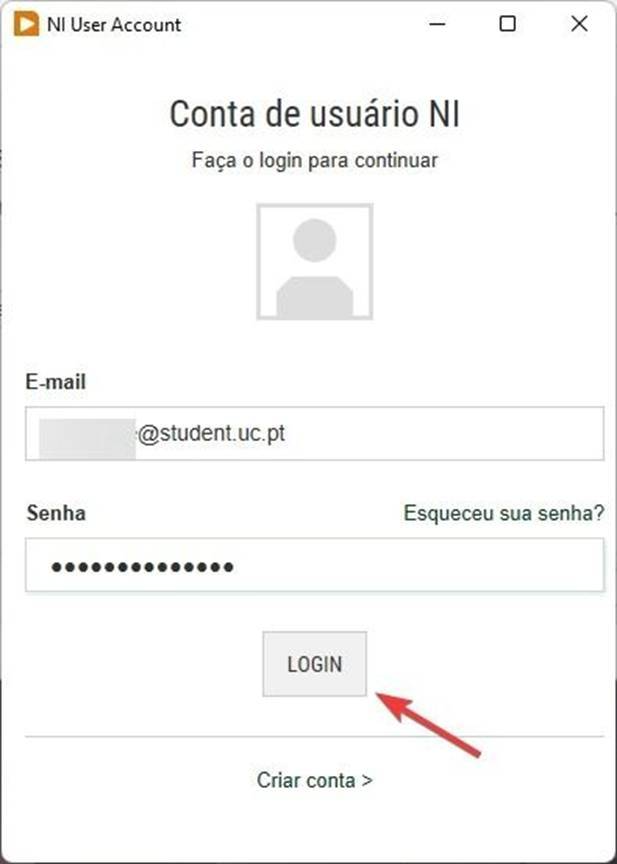
**Before using the software, you must register your account with NI, using the site:** [https://lumen.ni.com/nicif/us/header\_create/content.xhtml?action=create&du=https://www.ni.com/myni/dashboard/](https://www.ni.com/myni/dashboard/ "https://www.ni.com/myni/dashboard/")
You must use your institutional e-mail for his step (ucXXXXXXXXXX@student.uc.pt)
**To access this software:**
- Download the software at [https://installers.deec.uc.pt/labview\_multisim/labview\_multisim.zip](https://installers.deec.uc.pt/labview_multisim/labview_multisim.zip)
- Extract the file and install the software:
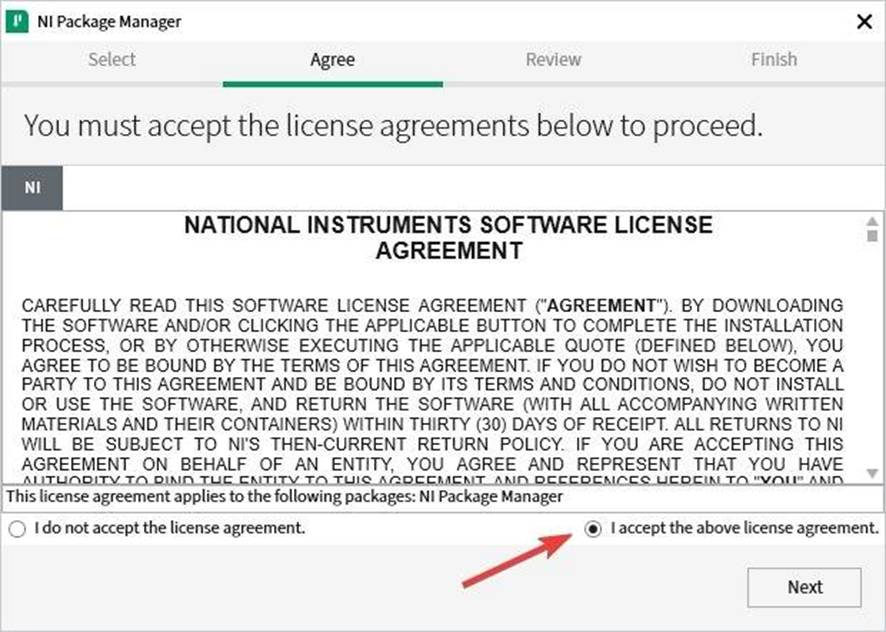
\- In the next steps click "next" and accept all the license agreements that will appear :

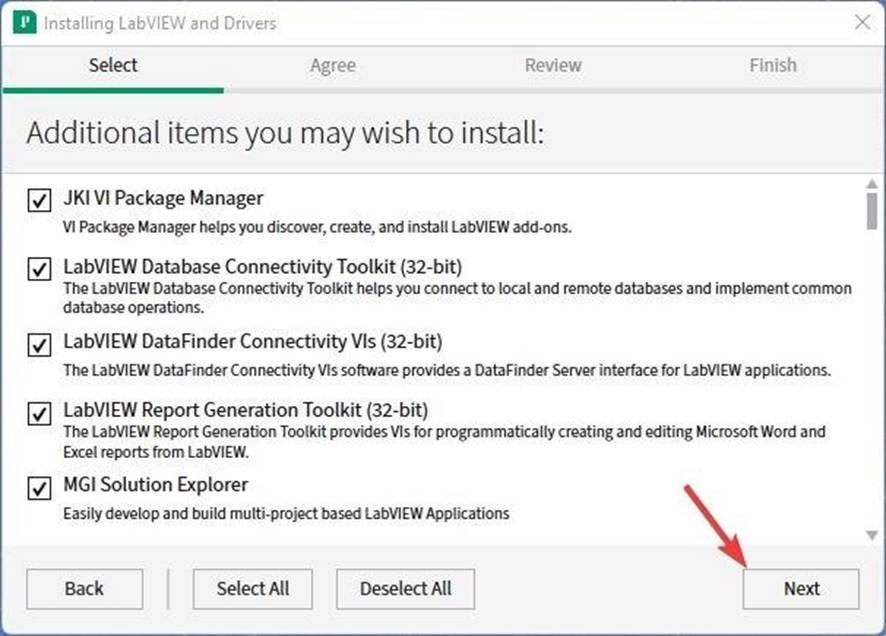
\- Choose the software that you will need to install and click "next":

\- In the next steps click "next" and accept all the license agreements that will appear :

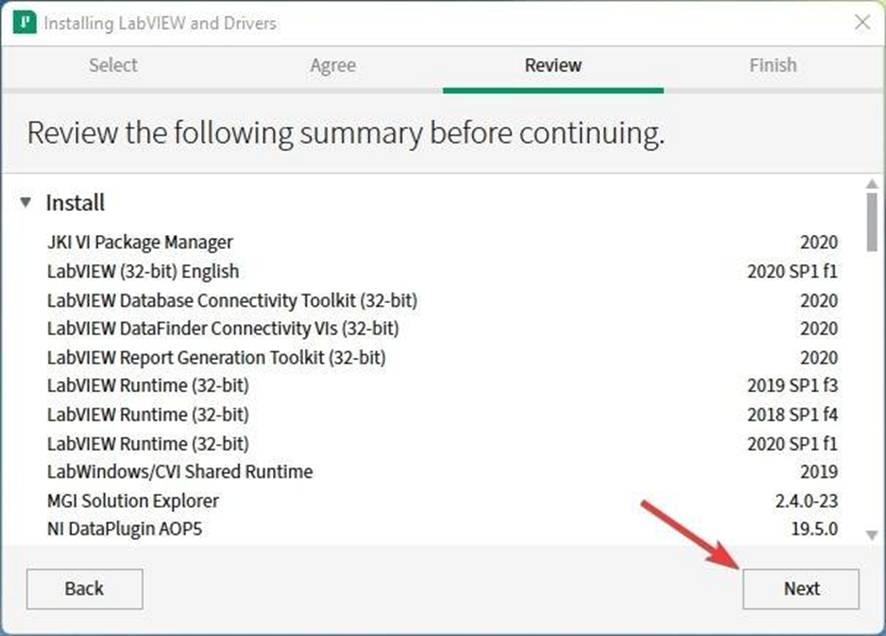
\- Confirm that the chosen software is correct:
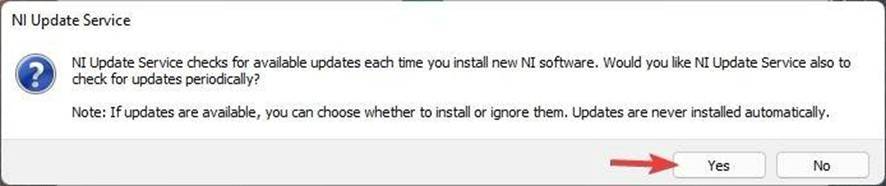
\- Accept that NI Update Service checks for updates:
\- Login using the account you created:
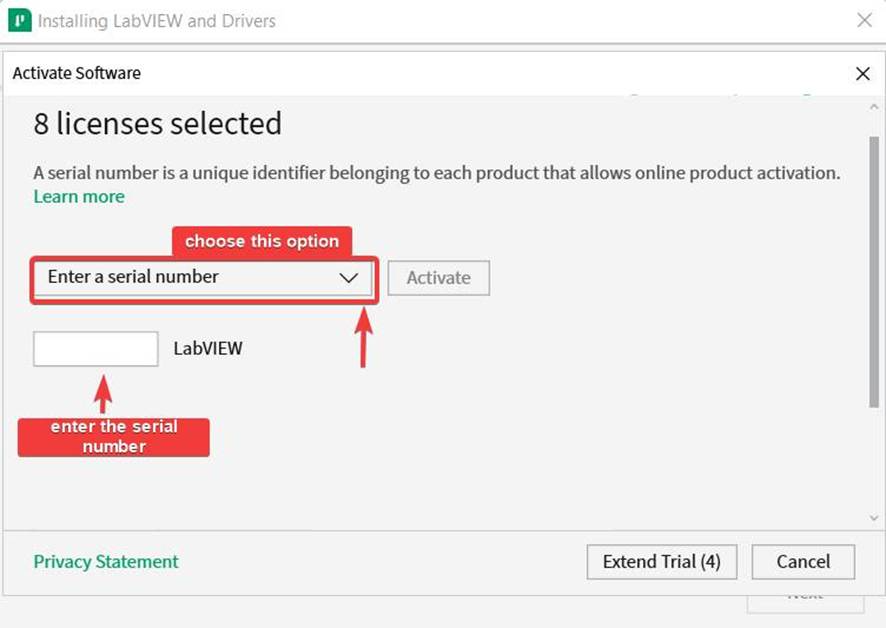
\- Choose "Enter a serial number":
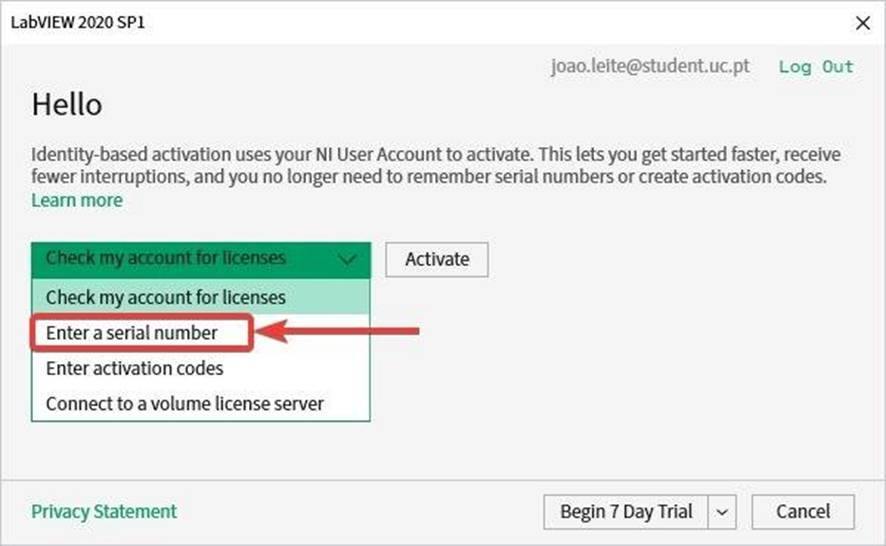
\- Enter the serial number, from the file "LABVIEW SERIAL" inside the downloaded zip file, and click "Activate":
# Printing & Copies
# Printing and Copies
DEEC provides its employees with a modern copy and print system, the operating details of which are explained in this document.
For configuration purposes on computers, there are 3 virtual printers, whose names and function are:
- **CacifosColor** – Color printing will be output to the following physical printer: Konica Minolta C368
- **CacifosGrayscale** – Black & white printing will come from one of the following physical printers: Konica Minolta C368 or Konica Minolta 284e. If you print in color, the printout will be automatically converted to black & white.
- **Gab-3a4** – Black & white or color printing, as defined by the user, will be output to the following physical printer: Konica Minolta C280
- The specific hardware is abstracted from the user, meaning that in the event of a malfunction, you do not need to reinstall specific drivers;
- Transparent balancing is possible for the user, with obvious advantages at times of peak use;
- Duplex is enabled by default on all printers;
- Improvement of environmental impact;
- Overall reduction of printing costs;
- [Windows](https://helpdesk.deec.uc.pt/help/en-us/42/94 "https://helpdesk.deec.uc.pt/help/en-us/42/94")
- [Linux](https://helpdesk.deec.uc.pt/help/en-us/42/95 "https://helpdesk.deec.uc.pt/help/en-us/42/95")
The Physical equipment specifications are presented in the following table:
| **Place**
| | **Cost/page** |
|---|
| Konica Minolta C368 | Sala dos Cacifos | – A3
– Laser
– Color
– Duplex
– Scan to e-mail | B&W = 0.003€ Color= 0.03€
|
| Konica Minolta 284e | Sala dos Cacifos | – A3
– Laser
– Black & White
– Duplex
– Scan to e-mail | B&W = 0.003€ Color = 0.03€
|
| Konica Minolta C280 | Gabinete 3A.4 | – A3
– Laser
– Color
– Duplex
– Scan to e-mail | B&W = 0.004€ Color = 0.04€
|
To use this service you need a @deec.uc.pt or @uc.pt account!
### Introduction
In this document, the installation of the printers in the locker room and cabinet 3A4 on Windows will be presented step by step.
Installing the printer
**1 –** To install the printers it is necessary to download the drivers [here](https://gofile.me/3Cvzn/W9C93v0LA "https://gofile.me/3Cvzn/W9C93v0LA").
**2-** Run the client-local-install.exe installer located in the “drivers \\ client \\ win” folder in the ZIP file.
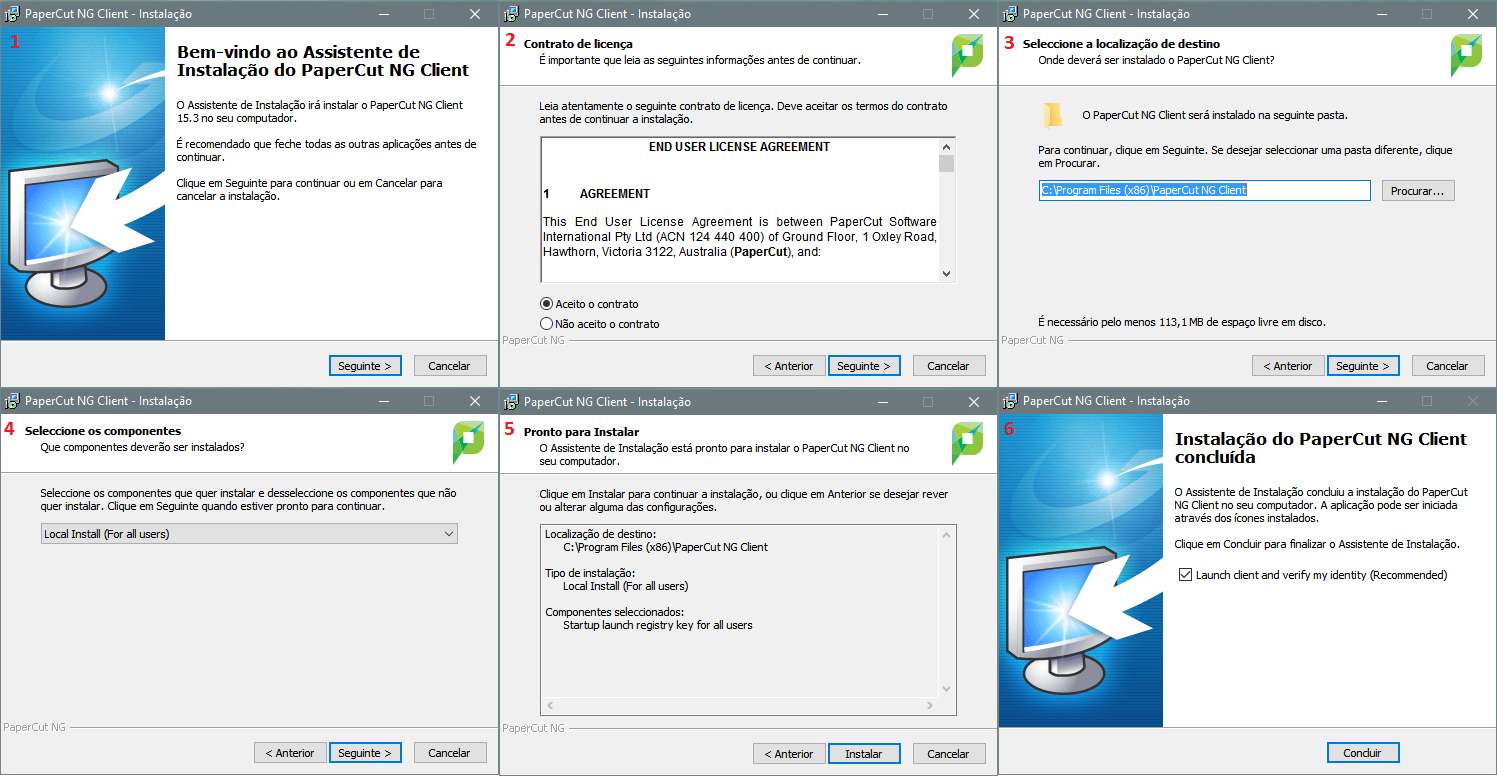
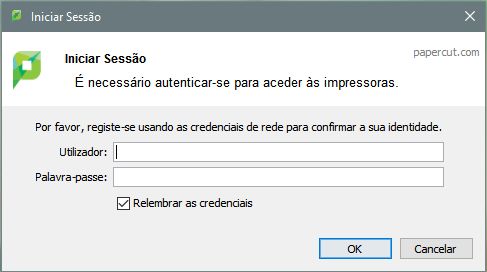
**3-** Enter your DEEC credentials.
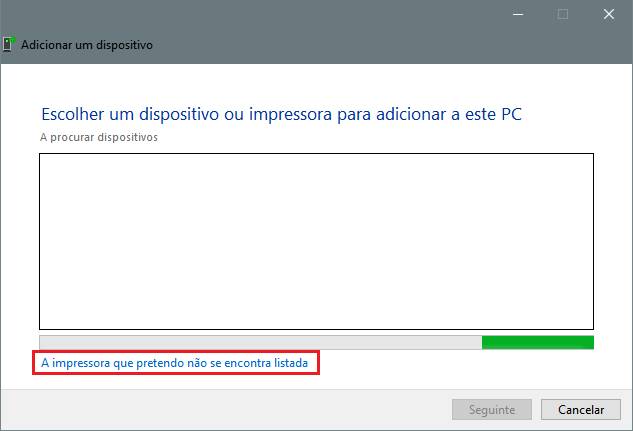
**4-** Subsequently, access the Control Panel, option “View devices and printers” and select the option “Add new printer”.
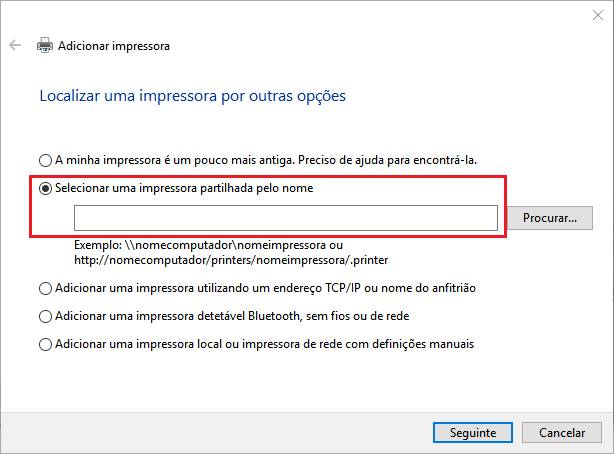
**5-** In the window that will open (Add a device), click on “The printer I want is not listed”.
**6-** Then select the option "Select a printer shared by name" and enter the address of the printer you want to install:
- Color printer in the locker room: [http://print.deec.uc.pt:631/printers/CacifosColor](http://print.deec.uc.pt:631/printers/CacifosColor)
- Black and white printer from the locker room: [http://print.deec.uc.pt:631/printers/CacifosGrayscale](http://print.deec.uc.pt:631/printers/CacifosGrayscale)
- Color printer in 3A4: [http://print.deec.uc.pt:631/printers/gab-3a4](http://print.deec.uc.pt:631/printers/gab-3a4)
**7**– Then click on the “Disk” button and choose the driver that you downloaded in the first step of this manual.

**8-** Select the driver in the “drivers \\ drivers \\ win \\ PC-Global-Print-Driver” folder and click on next.

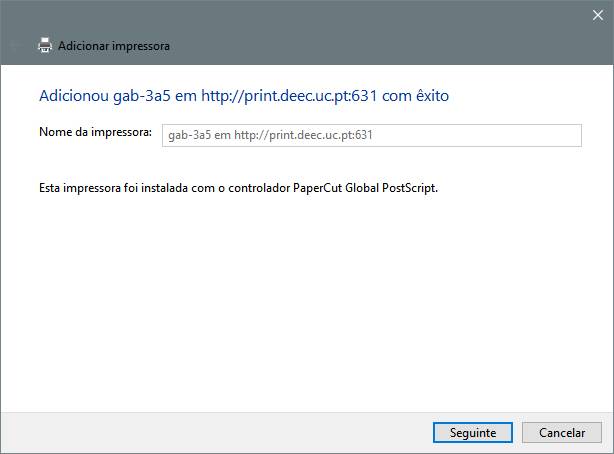
##### The printer is now successfully installed.
####
#### Default duplex printing
To perform default duplex printing, the following steps are required:
**1 –** Access the control panel.
**2 –** With the right mouse button on the desired printer, select the option “Printing preferences”.
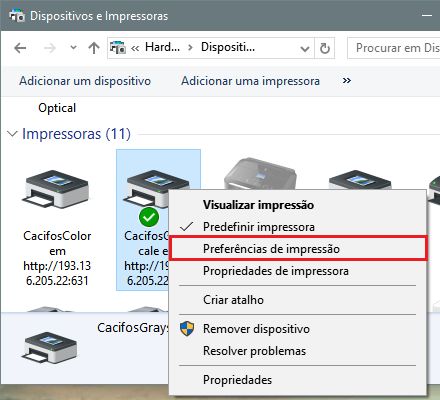
**3 –** In the "Printing Preferences" window, select the "Layout" tab and in the "Print on both sides" dropdown, use the option "Flip to the widest edge" or "Flip to the narrowest edge".

In this way, the prints you make will default to these settings.
# Printer Software Instalation for Linux
To use this service you need a @deec.uc.pt or @uc.pt account!
### Introduction
In this document, the installation of the printers in the locker room and cabinet 3A4 on Linux and Mac OS X using CUPS will be presented step by step.
To install the printer it is necessary to download the drivers [here](http://gofile.me/3Cvzn/nB8nE5opr "http://gofile.me/3Cvzn/nB8nE5opr").
### Installing the PaperCut client
### **Note:** You cannot print without the PaperCut client.
- **Linux**
Name: PCClient
Command: /opt/papercut/drivers/client/linux/pc-client-linux.sh

- **Mac OS X**
Run the installer **client-local-install** located in the “drivers\\client\\mac” folder int the ZIP file.
If you see the error “can’t be opened because it is from an unidentified developer.”, Go to System Preferences> Security & Privacy and under “Allow applications downloaded from:”, select “Anywhere”.
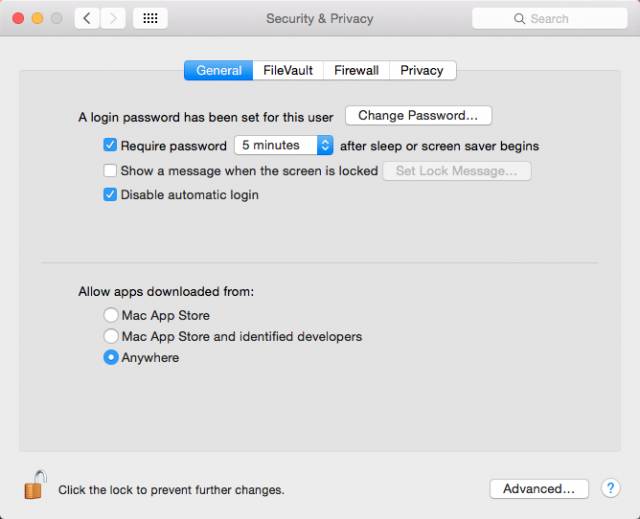
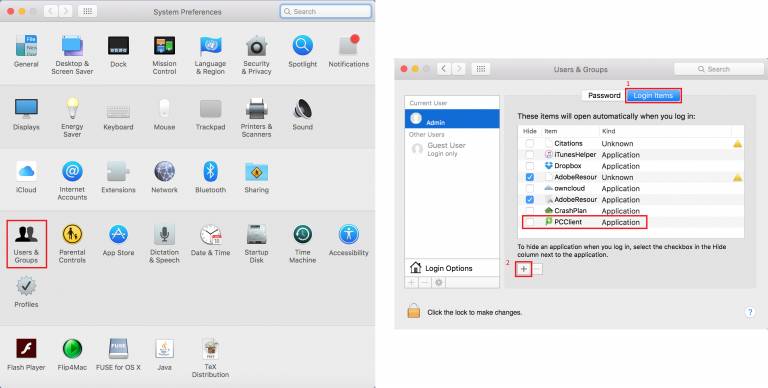
For the PaperCut client to start automatically with the operating system, it is necessary to go to System Preferences> Users & Groups and in “Login Items”, and add PCClient to the list (click on the “+”).
After installation, enter your DEEC credentials. 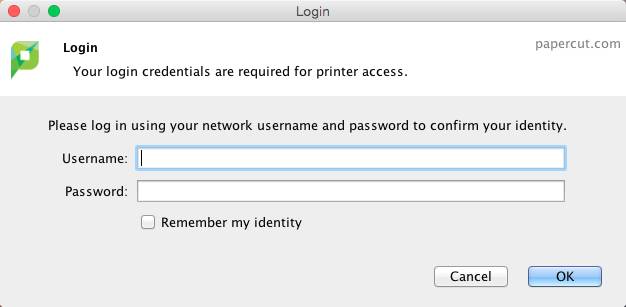
### **Installing the printer**
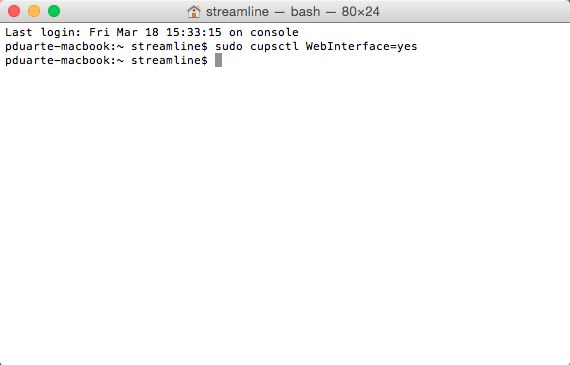
**1-** Open the Terminal and run the command “sudo cupsctl WebInterface = yes”:
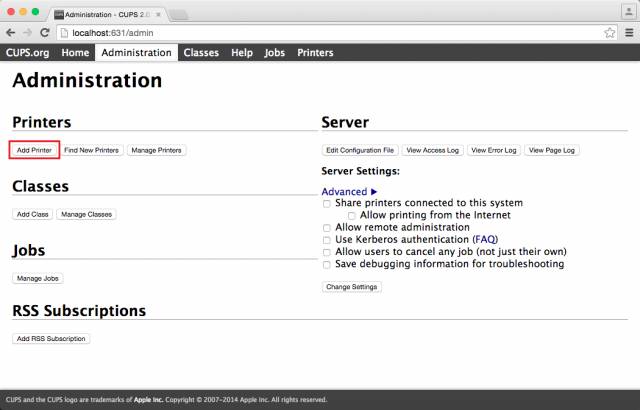
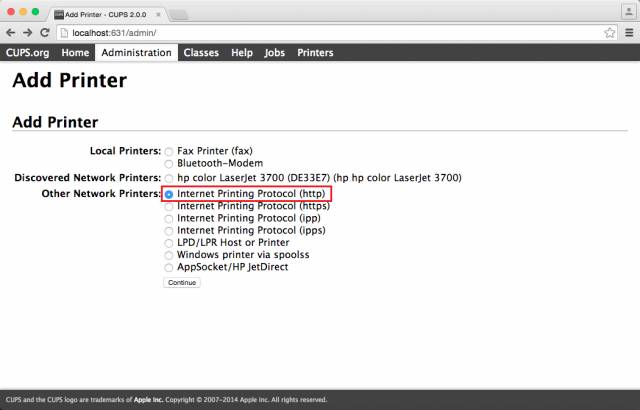
**2-** Through the browser access the address: http: // localhost: 631 /. Go to the “Administration” tab and “click on Add Printer”.
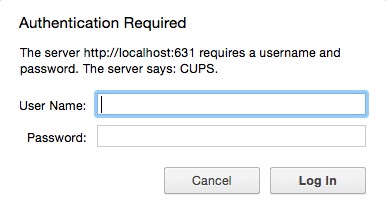
**3-** Enter your Mac's credentials.
**4-** Select “Internet Printing Protocol (https)”.
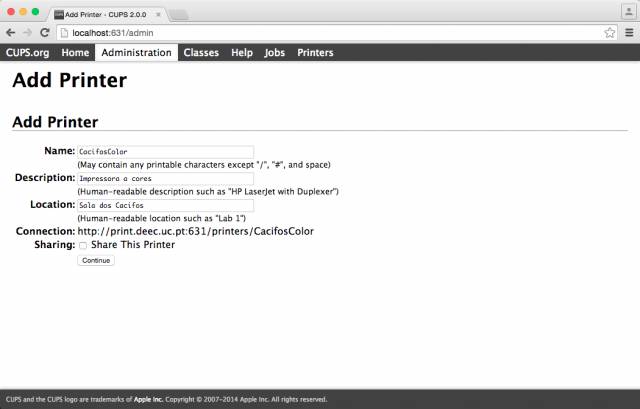
**5-** In the "Connection" field, enter the address of the printer you want to install:
- Color printer in the locker : [http://print.deec.uc.pt:631/printers/CacifosColor](http://print.deec.uc.pt:631/printers/CacifosColor)
- Black and white printer from the locker room: [http://print.deec.uc.pt:631/printers/CacifosGrayscale](http://print.deec.uc.pt:631/printers/CacifosGrayscale)
- Color printer in 3A4: [http://print.deec.uc.pt:631/printers/gab-3a4](http://print.deec.uc.pt:631/printers/gab-3a4)

**6-** Fill in the following fields:
**7-** Select in the Make field select the option Generic and then select the driver “Generic PostScript Printer (en)”:

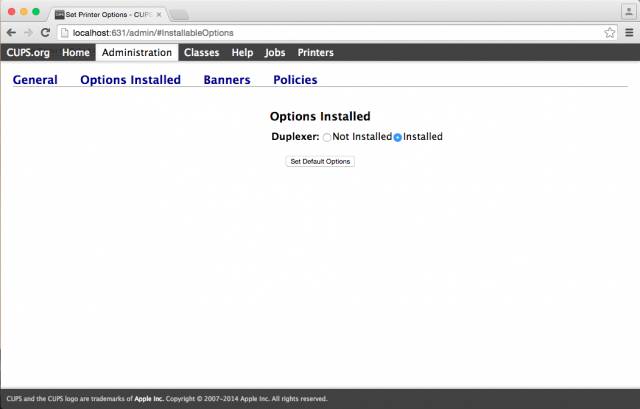
**8-** Open the Options Installed tab and in the Duplexer field, select the Installed option. Finally click on Set Default Options.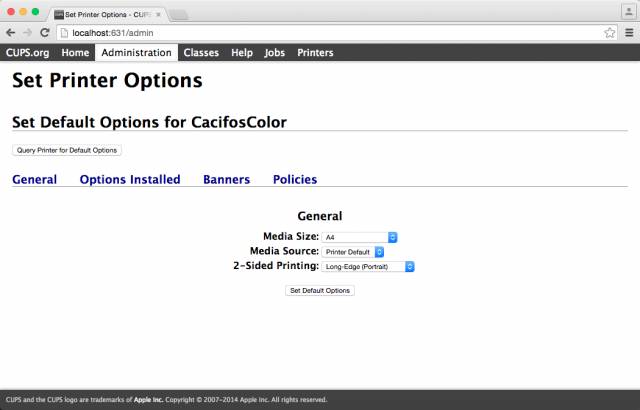
**9-** Abrir o separador Options Installed e no campo Duplexer, selecionar a opção Installed. Por fim clicar em Set Default Options.
# Wi-Fi
# Wi-Fi DEEC Description
To use this service you need a @deec.uc.pt or @uc.pt account!
In addition to the EDUROAM network, DEEC has its own wireless network that covers Teachers' offices, most classrooms and teaching labs, providing local addressing and resources.
The complete list of spaces now equipped with Access Points is as follows:
1. Gabinetes de Docente no Piso 1 (4 units)
2. Gabinetes de Docente no Piso 3 (4 units)
3. Gabinetes de Docente no Piso 3A (4 units)
4. Gabinete de Gestão da Rede Informática
5. Laboratório de Apoio Informático 1
6. Laboratório de Apoio Informático 3
7. Laboratório de Automação
8. Laboratório de Circuitos
9. Laboratório de Controlo
10. Laboratório de Electrónica
11. Laboratório de Electrónica de Potência
12. Laboratório de Hiperfrequências
13. Laboratório de Instrumentação e Medidas
14. Laboratório de Máquinas
15. Laboratório de Processamento Digital de Sinal
16. Laboratório de Redes e Sistemas de Computadores
17. Laboratório de Sistemas Digitais
18. Laboratório de Telecomunicações
19. Laboratório de Sistemas Electromecânicos
20. Sala de Estudo
21. Sala T4.2
22. Sala T4.3
23. Sala T5.2
24. Sala T5.3
25. Sala T6.3
26. Sala de Exames
This wireless network (DEEC) is part of the computer infrastructure of DEEC, thus allowing transparent and fast access to DEEC local network resources. The EDUROAM wireless network (see below) is still available in the department's public areas.
For technical configurations, the settings to use for network access are as follows:
| **Definition** | | **Value to set** |
|---|
| Wireless Type | Types of wireless networking technology that supports wireless networking | 802.11 a/b/g/n
Bandwidth up to 900Mbps per space
Support for 2.4GHz and 5GHz frequencies |
| SSID | Wireless Network Name | DEEC |
| Wireless Protection | Wireless Encryption System Type | WPA 2 (AES/CCMP, Dynamic) |
| Authentication
(802.1X) | Method of authenticating a device / user to a protected network | EAP-PEAP + MSCHAPv2 |
| Certificate Validation | Digital Certificate Verification and Validation System | Do not check / Disabled |
| Login | Login of the user who wants to connect to the network | DEEC.UC.PT Domain Email Address
(for example, user@deec.uc.pt, or uc212345678@alunos.deec.uc.pt) |
| Password | Password of the user who wants to connect to the network | Password of the respective account |
1. [Windows 7](https://helpdesk.deec.uc.pt/help/en-us/9-setup-manual/11-windows-7 "https://informatica.deec.uc.pt/redes/redes-sem-fios/instalacao-deec-win7/")
2. [Windows 8.1](https://helpdesk.deec.uc.pt/help/en-us/9-setup-manual/12-windows-8-1 "https://informatica.deec.uc.pt/redes/redes-sem-fios/instalacao-deec-win8/")
3. [Windows 10](https://helpdesk.deec.uc.pt/help/en-us/9-setup-manual/13-windows-10 "https://informatica.deec.uc.pt/redes/redes-sem-fios/instalacao-deec-win10")
4. [Android](https://helpdesk.deec.uc.pt/help/en-us/9-setup-manual/14-android "https://informatica.deec.uc.pt/redes/redes-sem-fios/instalacao-deec-android")
5. [IPhone](https://helpdesk.deec.uc.pt/help/en-us/9-setup-manual/15-iphone "https://informatica.deec.uc.pt/redes/redes-sem-fios/instalacao-deec-iphone")
6. [Apple Mac OS X](https://helpdesk.deec.uc.pt/help/en-us/9-setup-manual/16-macos "https://informatica.deec.uc.pt/redes/redes-sem-fios/instalacao-deec-macos")
To use this service you need a @deec.uc.pt, @uc.pt or any other compatible institution account!
The UC wireless network is part of the Eduroam network and can be used by all teachers, students and employees who have an email account at a UC organization or any other institution that has joined the Eduroam network. Likewise, UC users, when visiting Eduroam institutions, in Portugal or abroad, will be able to access their wireless networks without any change in the configuration of their equipment.
The EDUROAM network is available in the main public areas of DEEC.
Regarding technical configurations, the settings to be used for network access are as follows:
| **Definition** | | **Value to set** |
|---|
| Wireless Type | Types of wireless networking technology that supports wireless networking | 802.11 a/b/g/n
Bandwidth up to 900Mbps per space
Support for 2.4GHz and 5GHz frequencies |
| SSID | Wireless Network Name | DEEC |
| Wireless Protection | Wireless Encryption System Type | WPA 2 (AES/CCMP, Dynamic) |
| Authentication
(802.1X) | Method of authenticating a device / user to a protected network | EAP-PEAP + MSCHAPv2 |
| Certificate Validation | Digital Certificate Verification and Validation System | Do not check / Disabled |
| Login | Login of the user who wants to connect to the network | DEEC.UC.PT Domain Email Address
(for example, user@deec.uc.pt, or uc212345678@alunos.deec.uc.pt) |
| Password | Password of the user who wants to connect to the network | Password of the respective account |
1. [Windows 7](https://helpdesk.deec.uc.pt/help/en-us/9-setup-manual/11-windows-7 "https://helpdesk.deec.uc.pt/help/en-us/9-setup-manual/11-windows-7")
2. [Windows 8.1](https://helpdesk.deec.uc.pt/help/en-us/9-setup-manual/12-windows-8-1 "https://helpdesk.deec.uc.pt/help/en-us/9-setup-manual/12-windows-8-1")
3. [Windows 10](https://helpdesk.deec.uc.pt/help/en-us/9-setup-manual/13-windows-10 "https://helpdesk.deec.uc.pt/help/en-us/9-setup-manual/13-windows-10")
4. [Android](https://helpdesk.deec.uc.pt/help/en-us/9-setup-manual/14-android "https://helpdesk.deec.uc.pt/help/en-us/9-setup-manual/14-android")
5. [IPhone](https://helpdesk.deec.uc.pt/help/en-us/9-setup-manual/15-iphone "https://helpdesk.deec.uc.pt/help/en-us/9-setup-manual/15-iphone")
On Apple Mac OS X operating systems, just select the “eduroam” network, when it is available. The operating system asks for the login (email) and the respective password and the connection is made automatically, through the combination WPA2 + AES + PEAP + MSCHAP_v2.
In case of difficulty, they can contact the Helpdesk service, through the usual channels.
The use of the UC wireless network is regulated by the UC network, RCTS network usage rules and applicable law.
More information:
[Eduroam wireless network at UC](https://idp.uc.pt/idp/profile/SAML2/Redirect/SSO?execution=e1s1&lang=pt_PT "https://idp.uc.pt/idp/profile/SAML2/Redirect/SSO?execution=e1s1&lang=pt_PT")
IMPORTANT TECHNICAL NOTE: If you use an authentication account for the @ deec.uc.pt or @ students.deec.uc.pt domains, you must disable the option to check encryption certificates.
[Autoconfiguration file for Apple systems](https://cloud.deec.uc.pt/index.php/s/v4CyacBrBAt86gG/download "https://cloud.deec.uc.pt/index.php/s/v4CyacBrBAt86gG/download") (Students)
[Autoconfiguration file for Apple systems ](https://cloud.deec.uc.pt/index.php/s/Md1bMdeNGoGEHyN/download "https://cloud.deec.uc.pt/index.php/s/Md1bMdeNGoGEHyN/download")(Collaborators)
To use this service you need a @deec.uc.pt or @uc.pt account!
### DEEC Network Installation Guide on Windows 10
#### Introduction
In this document you will be presented step by step the installation ofWireless Network.
Then click on “Manually connect to a wireless network”:
The fields must be completed, according to the following image:
Attention, the "Network Name" is case sensitive.
On the next page, go to “Change Connection Settings”:
The configuration to be done in the "Connection" and "Security" tab is explicit in the two images below:
On the “Security” tab, “DEEC Wireless Network Properties”, “Settings”, you should uncheck “Validate Server Certificate”:
In turn go to “Configure” and uncheck “Automatically use login name (…)”:
Finally, you only need to enter your user credentials in the DEEC.UC.PT domain:
To use this service you need a @deec.uc.pt or @uc.pt account!
### DEEC Network Installation Guide on Windows 7
#### Introduction
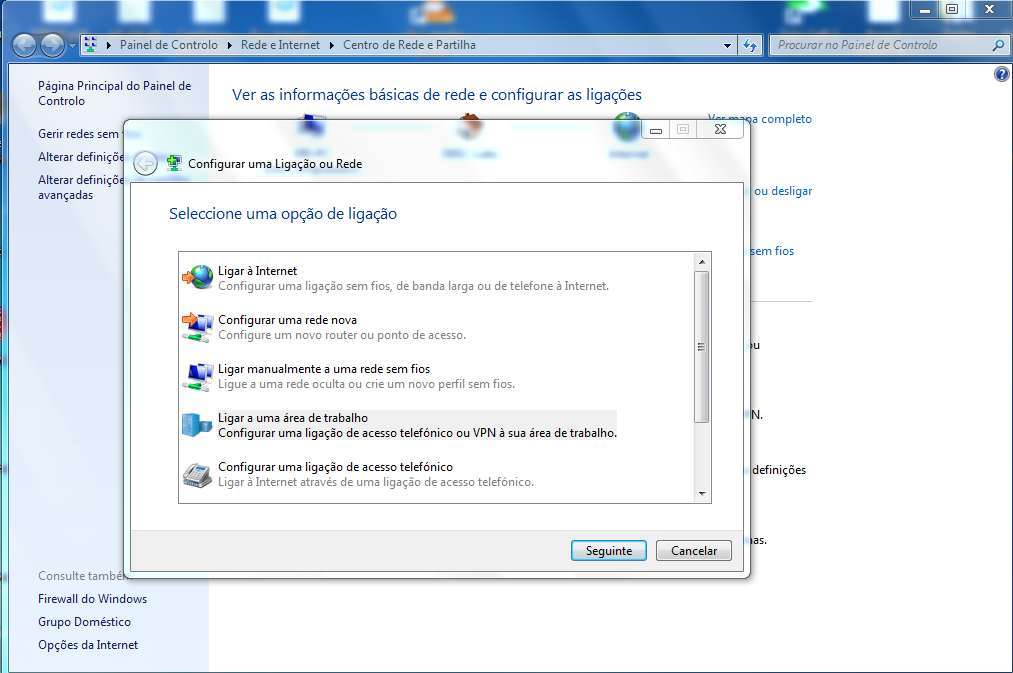
In this document you will be presented step by step the installation of Eduroam Wireless Network.
#### Windows 7
Then click on “Set up a new connection or network”:
The fields must be completed, according to the following image:
Attention, the "Network Name" is case sensitive.
On the next page, go to “Change Connection Settings”:
The configuration to be made in the "Connection" and "Security" tab is explicit in the two images below:
On the “Security” tab, “DEEC Wireless Network Properties”, “Settings”, you should uncheck “Validate Server Certificate”:
Finally, you only need to enter your user credentials in the DEEC.UC.PT domain:
To use this service you need a @deec.uc.pt or @uc.pt account!
### DEEC Network Installation Guide on Windows 8
#### Introduction
In this document you will be presented step by step the installation of Eduroam Wireless Network.
The fields must be completed, according to the following image:
Attention, the "Network Name" is case sensitive.
On the “Security” tab, “DEEC Wireless Network Properties”, “Settings”, you should uncheck “Validate Server Certificate”:
Finally, you only need to enter your user credentials in the DEEC.UC.PT domain:
To use this service you need a @deec.uc.pt or @uc.pt account!
### DEEC Network Installation Manual on Android
#### Introduction
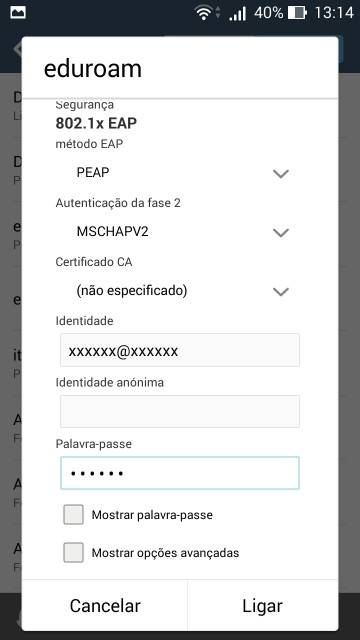
In this document, the installation of the Eduroam Wireless Network will be presented step by step.
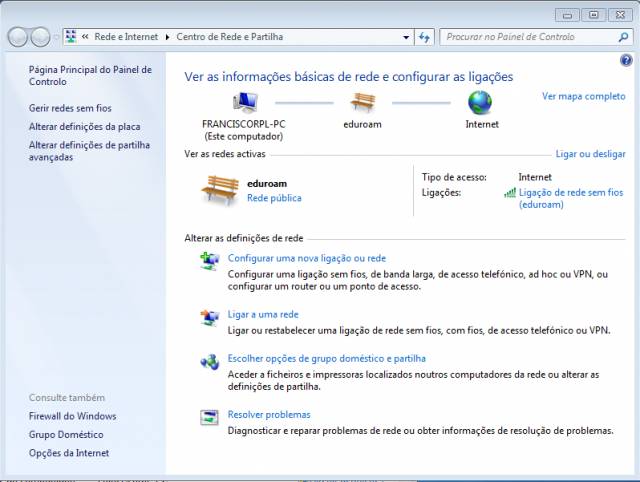
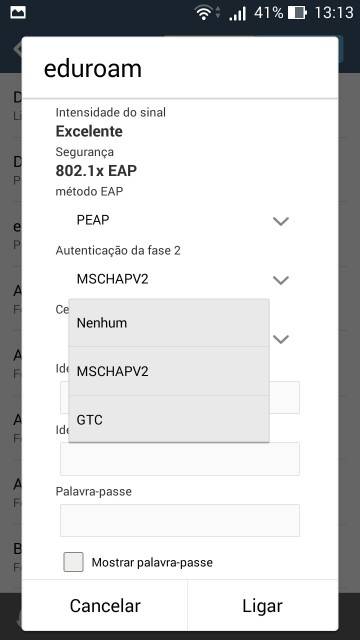
Go to "Settings", "Wi-Fi", select the "Eduroam" network, as in the follg image:

After that, new fields will appear to fill in.
In the “Authentication phase 2” field, you must choose the option “MSCHAPV2”, as in the following image:
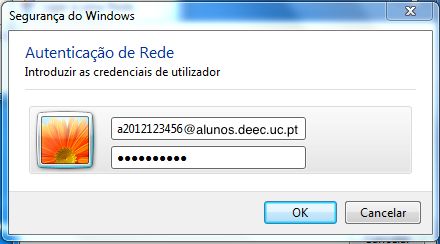
Finally, you only need to enter your user credentials (fields: “Identity” and “Password”) in the [DEEC.UC.PT](http://deec.uc.pt/) domain, as in the following example:
To use this service you need a @deec.uc.pt or @uc.pt account!
### IPhone DEEC Network Installation Manual
#### Introduction
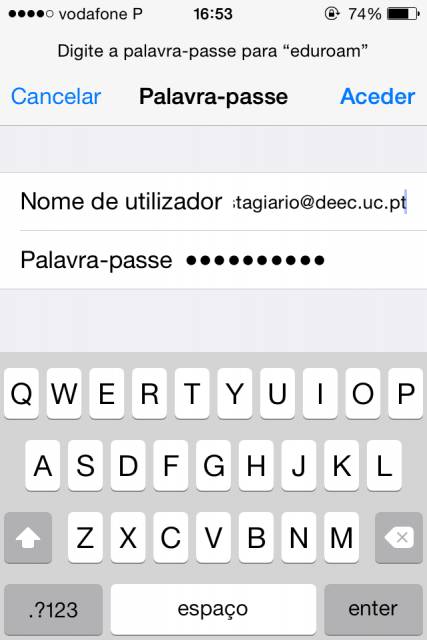
In this document, the installation of the Eduroam Wireless Network will be presented step by step.
Go to "Settings", "Wi-Fi", select the "eduroam" network, as in the following image:
Then, you only need to enter your user credentials (fields: “User name” and “Password”), as in the following example:
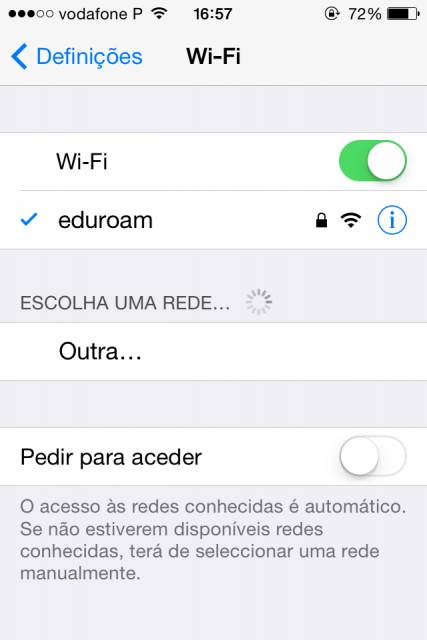
Then it is necessary to press “Accept”, as in the following image.

After completing these steps, the device accesses the network:
To use this service you need a @deec.uc.pt or @uc.pt account!
### DEEC Network Installation Guide on Windows 7
#### Introduction
In this document you will be presented step by step the installation of DEEC Wireless Network.
In the images in this document **DEEC-Labs** should be replaced by **DEEC**.
#### Windows 7
Then click on “Manually connect to a wireless network”:
The fields must be completed, according to the following image:
Attention, the "Network Name" is case sensitive.
On the next page, go to “Change Connection Settings”:
The configuration to be made in the "Connection" and "Security" tab is explicit in the two images below:
On the “Security” tab, “DEEC Wireless Network Properties”, “Settings”, you should uncheck “Validate Server Certificate”:
Finally, you only need to enter your user credentials in the DEEC.UC.PT domain:
To use this service you need a @deec.uc.pt or @uc.pt account!
### DEEC Network Installation Guide on Windows 8
#### Introduction
In this document you will be presented step by step the installation of DEEC Wireless Network.
In the images in this document **DEEC-Labs** should be replaced by **DEEC**.
The fields must be completed, according to the following image:
Attention, the "Network Name" is case sensitive.
On the “Security” tab, “DEEC Wireless Network Properties”, “Settings”, you should uncheck “Validate Server Certificate”:
Finally, you only need to enter your user credentials in the DEEC.UC.PT domain:
To use this service you need a @deec.uc.pt or @uc.pt account!
### DEEC Network Installation Guide on Windows 10
#### Introduction
In this document you will be presented step by step the installation of DEEC Wireless Network.
In the images in this document **DEEC-Labs** should be replaced by **DEEC**.
Then click on “Manually connect to a wireless network”:
The fields must be completed, according to the following image:
Attention, the "Network Name" is case sensitive.
On the next page, go to “Change Connection Settings”:
The configuration to be done in the "Connection" and "Security" tab is explicit in the two images below:
On the “Security” tab, “DEEC Wireless Network Properties”, “Settings”, you should uncheck “Validate Server Certificate”:
In turn go to “Configure” and uncheck “Automatically use login name (…)”:
Finally, you only need to enter your user credentials in the DEEC.UC.PT domain:
To use this service you need a @deec.uc.pt or @uc.pt account!
### DEEC Network Installation Manual on Android
#### Introduction
In this document, the installation of the DEEC Wireless Network will be presented step by step.
In the images in this document DEEC-Labs must be replaced by DEEC.
Go to "Settings", "Wi-Fi", select the "DEEC" network, as in the following image:
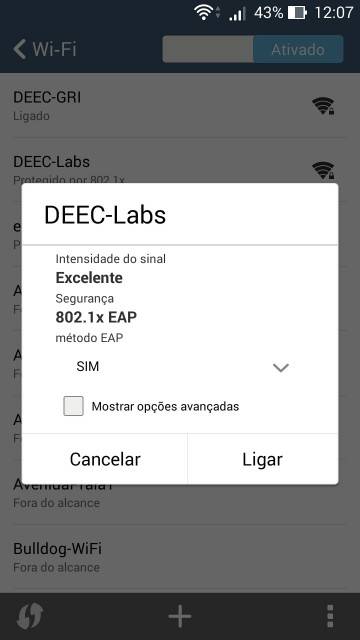
After that, new fields will appear to fill in.
In the “Authentication phase 2” field, you must choose the option “MSCHAPV2”, as in the following image:
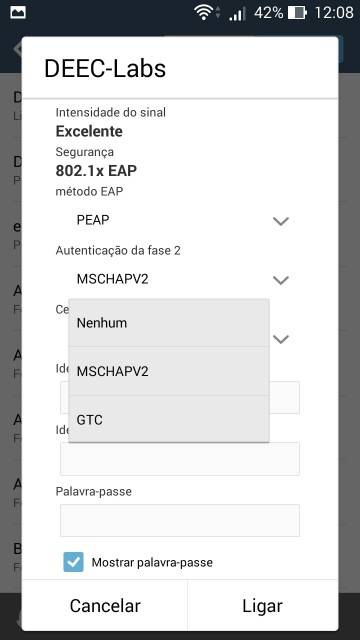
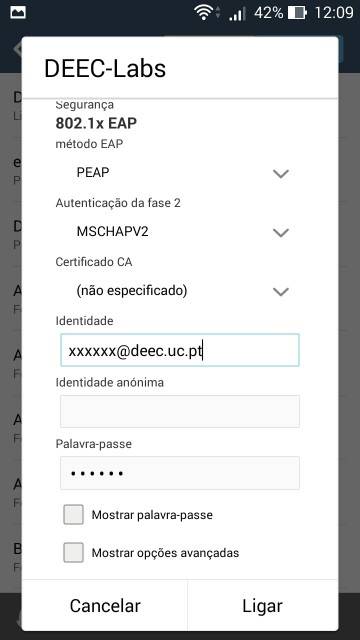
Finally, you only need to enter your user credentials (fields: “Identity” and “Password”) in the [DEEC.UC.PT](http://deec.uc.pt/ "http://DEEC.UC.PT") domain, as in the following example:
To use this service you need a @deec.uc.pt or @uc.pt account!
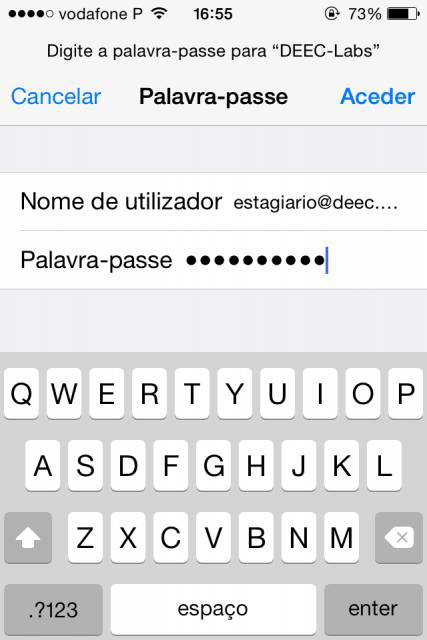
# IPhone DEEC Network Installation Manual
### Introduction
In this document, the installation of the DEEC Wireless Network will be presented step by step.
In the images in this document DEEC-Labs must be replaced by DEEC.
In one of the installation steps, it is necessary to enter your user credentials (fields: “Username” and “Password”), as in the following example:
Then it is necessary to press “Accept”, as in the following image.
After completing these steps, the device accesses the network:

To use this service you need a @deec.uc.pt or @uc.pt account!
### DEEC Network Installation Guide on MacOS
#### Introduction
In this document, the installation of the DEEC Wireless Network will be presented step by step.
#### MacOS
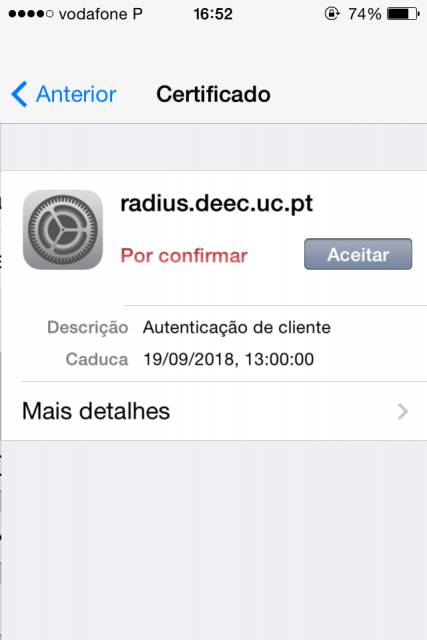
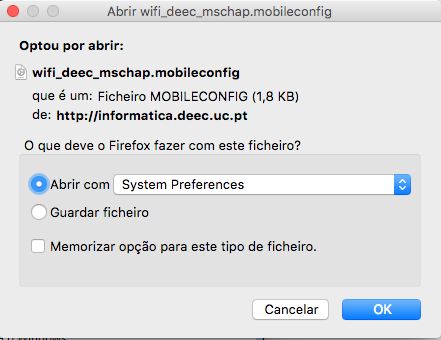
Install the user profile, located at [wifi\_deec\_mschap.mobileconfig](https://kb.deec.uc.pt/attachments/17)
Choose "Open with" System Preferences.
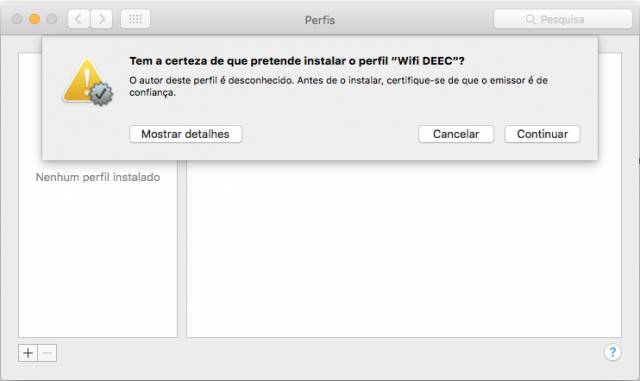
Select "Continue".
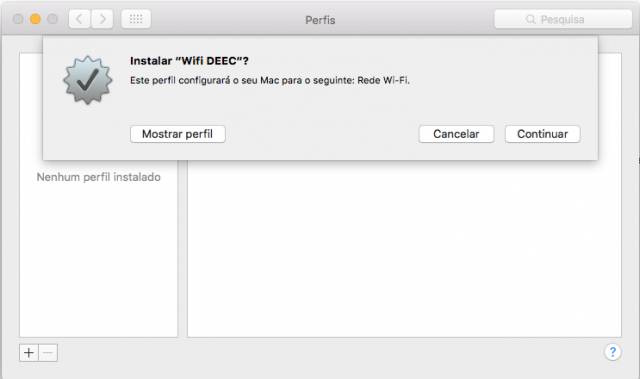
Select "Continue".
To use this service you need a @deec.uc.pt or @student.uc.pt account
### **Installation**
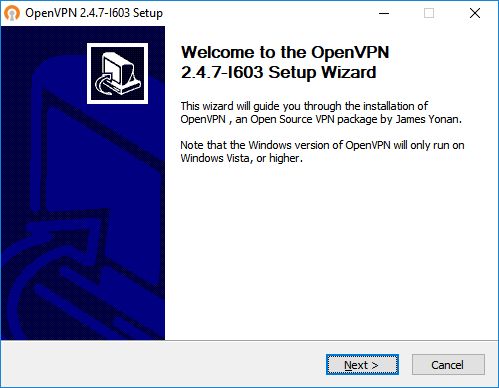
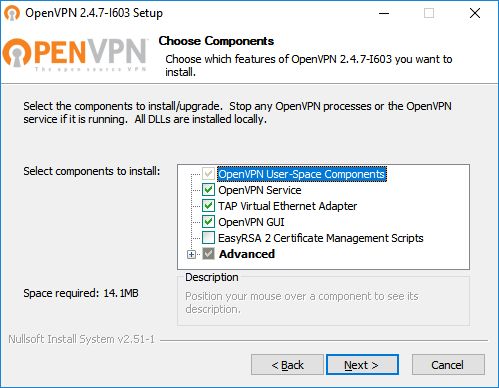
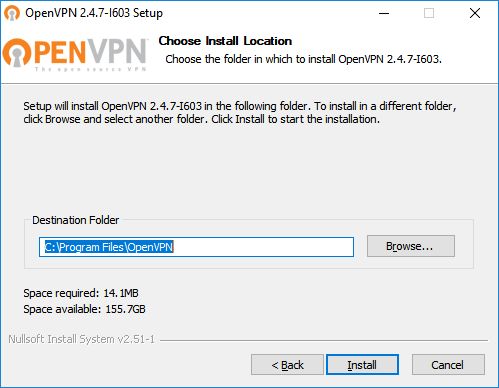
To download OpenVPN just go [here](https://openvpn.net/community-downloads/), and below you will find the respective download

Then, perform the respective installation

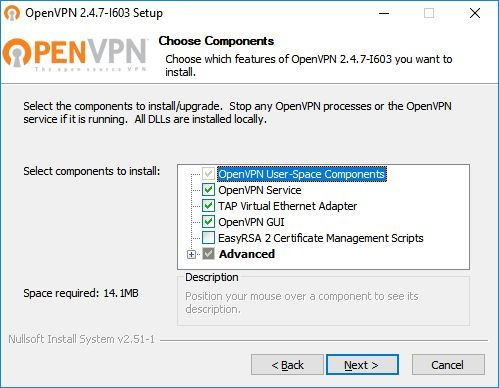
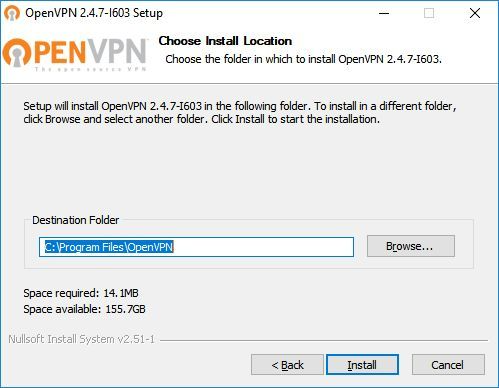
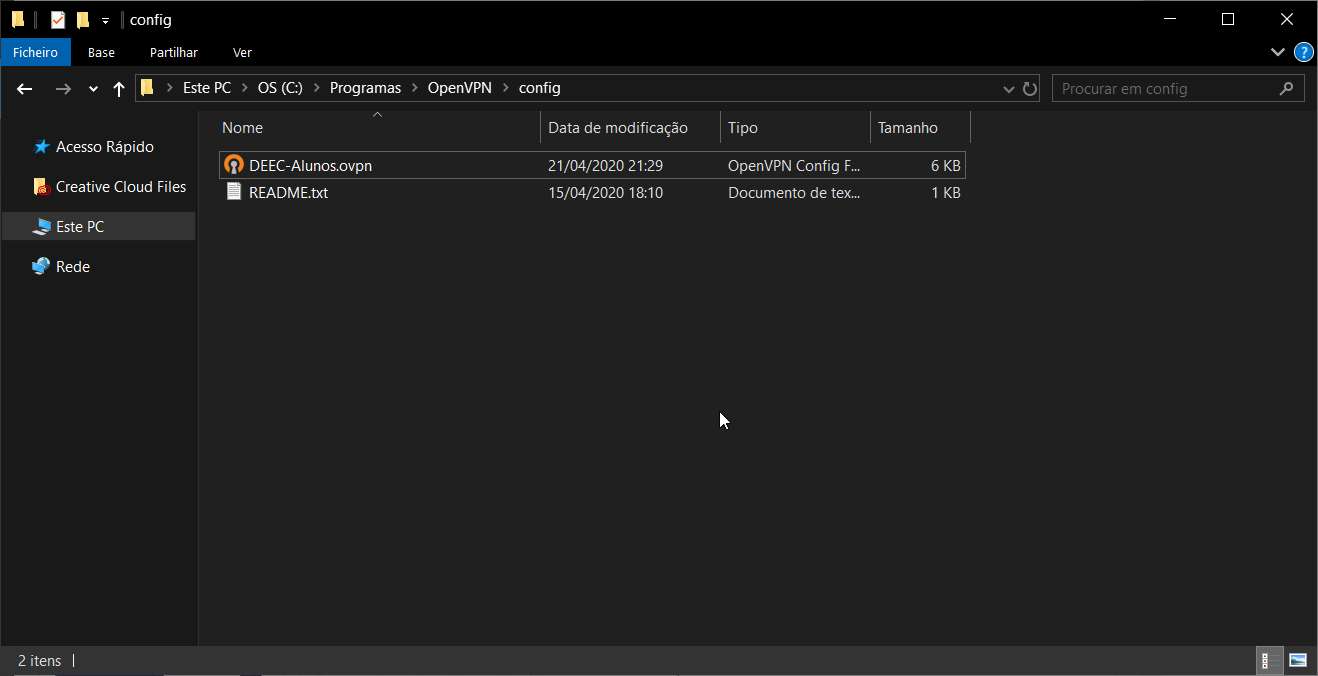
### **Configuration**
For your configuration, you should download [DEEC-Alunos.ovpn](https://kb.deec.uc.pt/attachments/18) and move it to “**C:\\Program Files\\OpenVPN\\config**”.
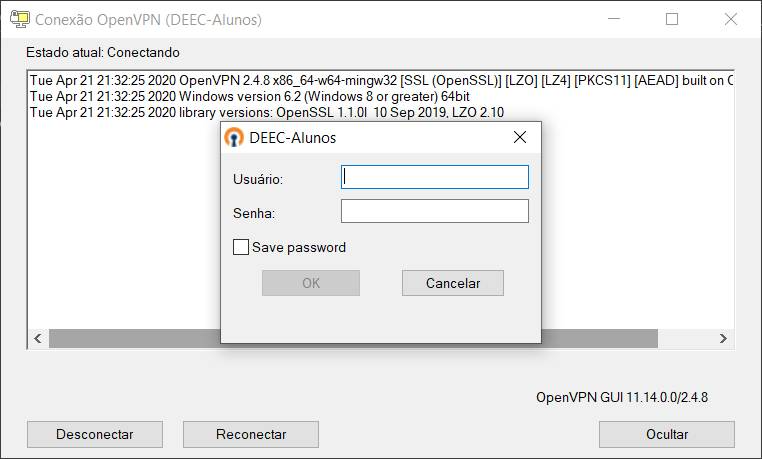
### **Connection**
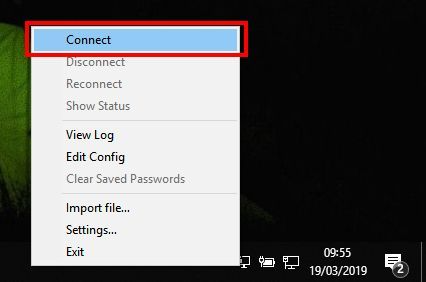
To finish, you will have to start the program “OpenVPN GUI” which, with its execution, will show an icon of a monitor with a lock on your task bar.

To finish, you will have to start the program “OpenVPN GUI” which, with its execution, will show an icon of a monitor with a lock on your task bar.
# DEEC VPN Client - Windows
To use this service you need a @deec.uc.pt or @student.uc.pt account
### OpenVPN Profiles
- [DEEC Teachers and Researchers](https://kb.deec.uc.pt/attachments/56)
- [DEEC Students](https://kb.deec.uc.pt/attachments/57)
Installation
To download OpenVPN just go [here](https://openvpn.net/community-downloads/ "https://openvpn.net/community-downloads/"), and below you will find the respective download.

Then, perform the respective installation.
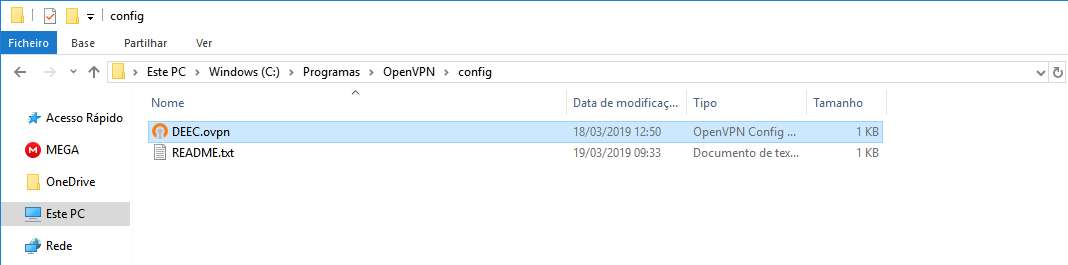
### Configuration
Move the OpenVPN profile to “**C:\\Program Files\\OpenVPN\\config**”.
### Connection
To finish, you will have to start the program “OpenVPN GUI” which, with its execution, will show an icon of a monitor with a lock on your task bar.

To finish, you will have to start the program “OpenVPN GUI” which, with its execution, will show an icon of a monitor with a lock on your task bar.

# VPN Client for teachers and researchers - Ubuntu
To use this service you need a @deec.uc.pt account!
### Installation
Install OpenVPN network manager by entering (copy/paste) into the terminal
```bash
sudo apt-get install network-manager-openvpn-gnome
```
When the installation is complete, restart the network-manager service
```
systemctl restart NetworkManager
```
### Configuration
Download the OpenVPN profile: [DEEC.ovpn](https://kb.deec.uc.pt/attachments/20)
Go to the Network Manager and under VPN, click the "+" button
[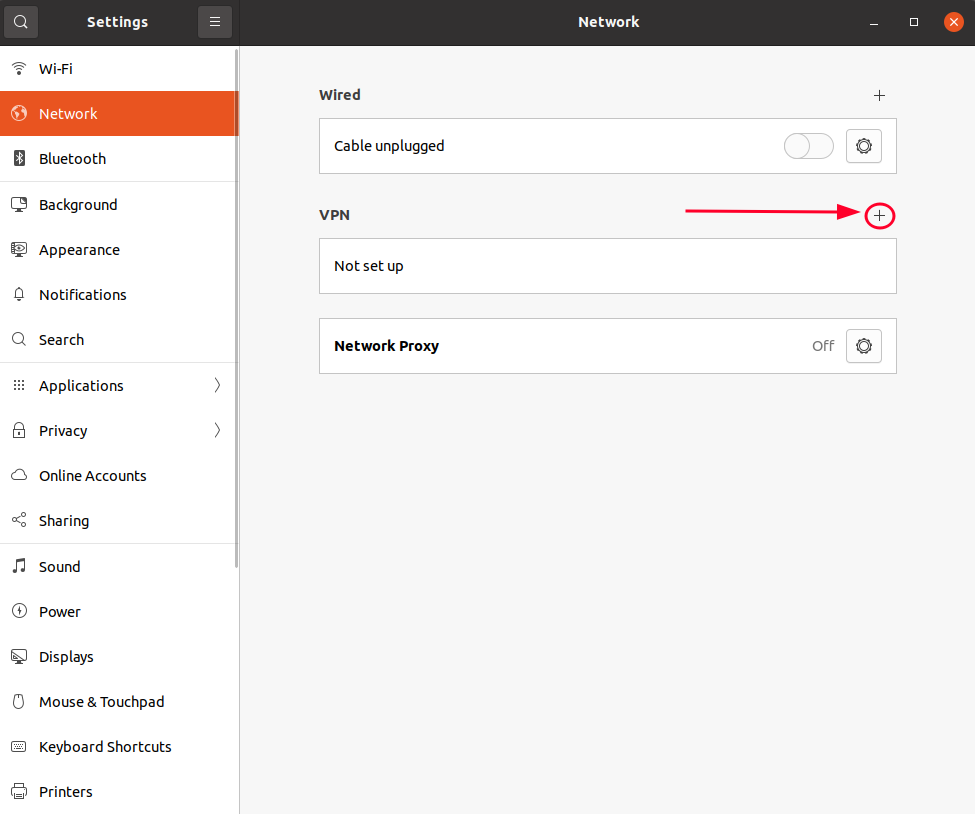](https://kb.deec.uc.pt/uploads/images/gallery/2022-11/image-1667407490016.png)
Click "Import from file..." and select the .ovpn file I've downloaded
[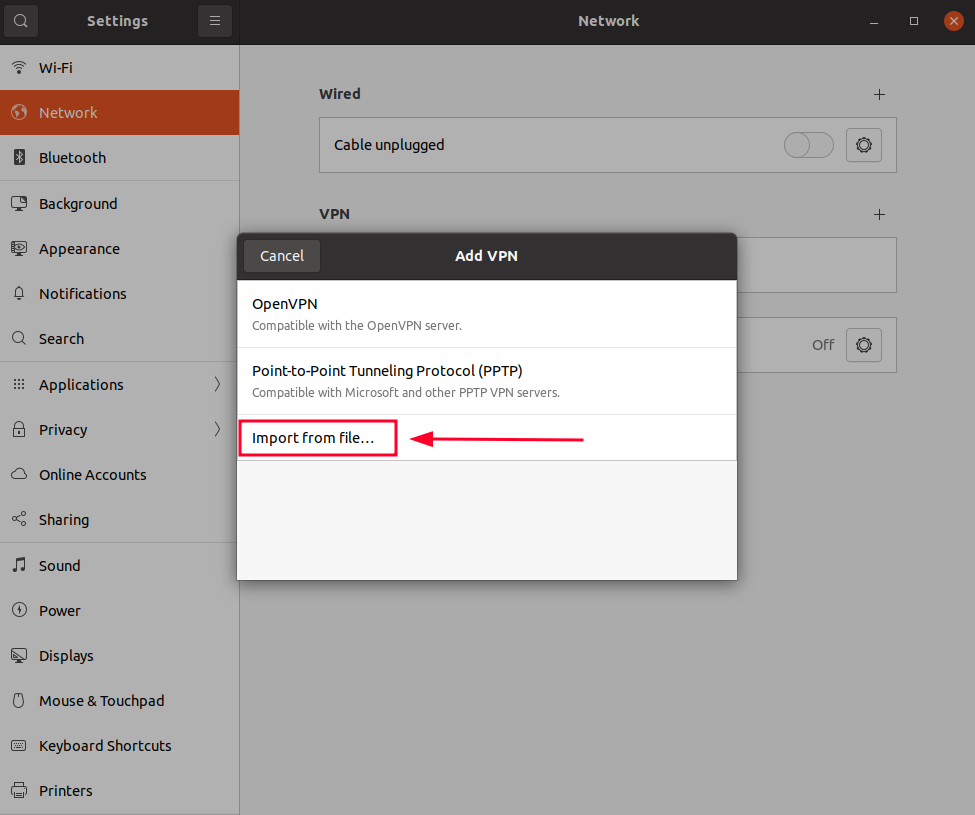](https://kb.deec.uc.pt/uploads/images/gallery/2022-11/image-1667407545580.png)
Input your credentials and click "Add"
[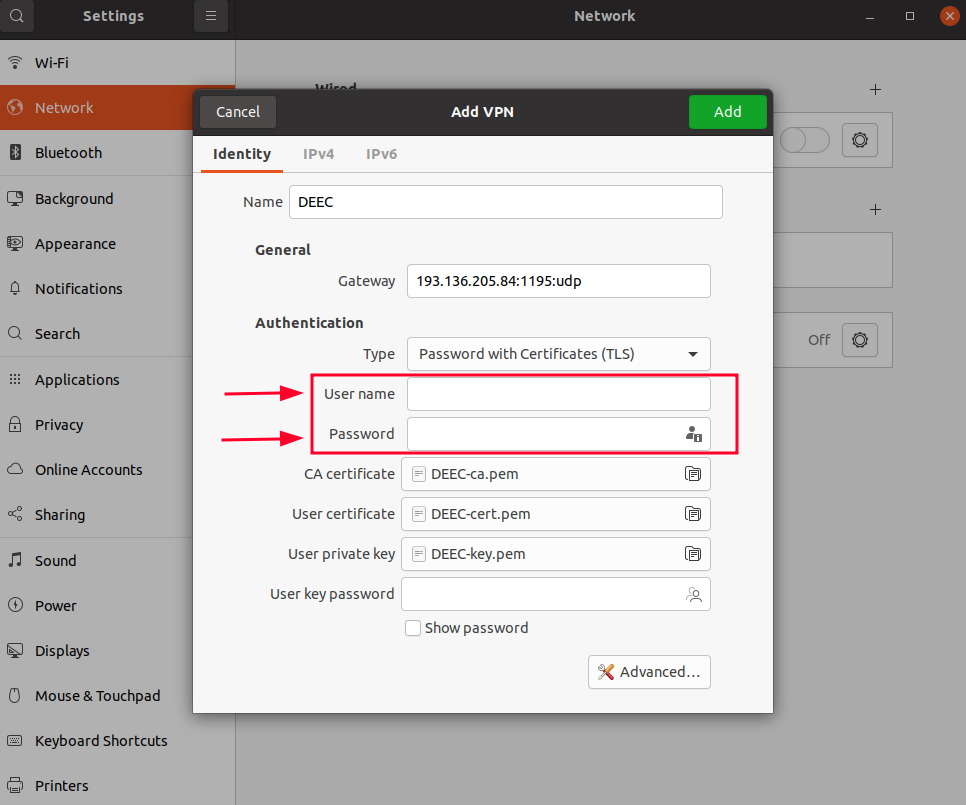](https://kb.deec.uc.pt/uploads/images/gallery/2022-11/image-1667407690728.png)
### Connection
Finally select the network manager icon, go to VPN Connections and select the created VPN.
To use this service you need a @deec.uc.pt account!
OpenVPN Installation, Configuration and Execution Manual on Android
This document will present, step by step, the installation, configuration and execution of OpenVPN on Android operating systems.
Before starting the installation and configuration of OpenVPN on your SmartPhone, you should check the following point:
-
Have an account for the configuration of OpenVPN, which is requested from the Management Office of the Computer Network

#### **Configuration and Execution:**
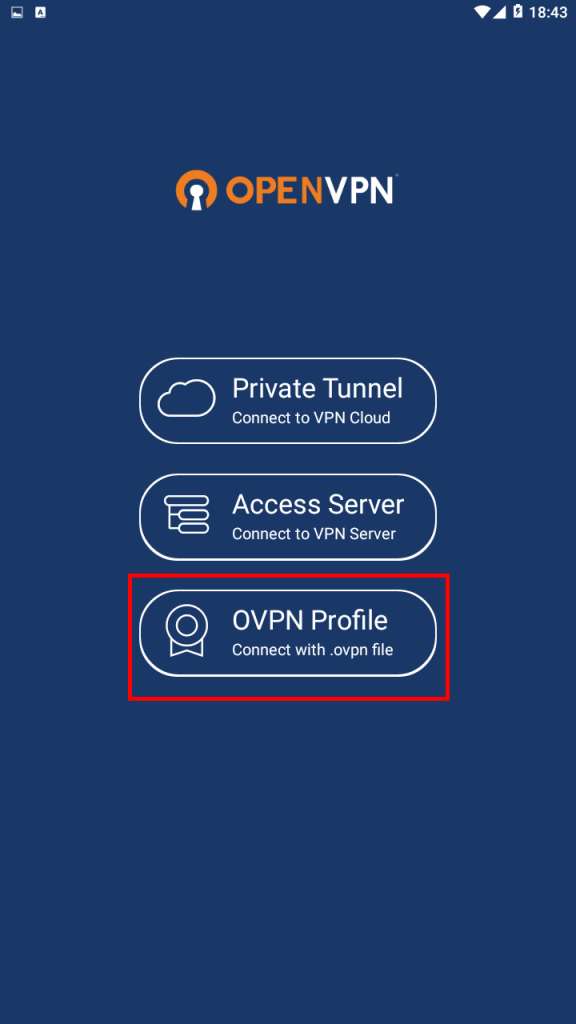
For your configuration, you must download the [DEEC.ovpn](https://kb.deec.uc.pt/attachments/21) file. Then go to “OVPN Profile”.
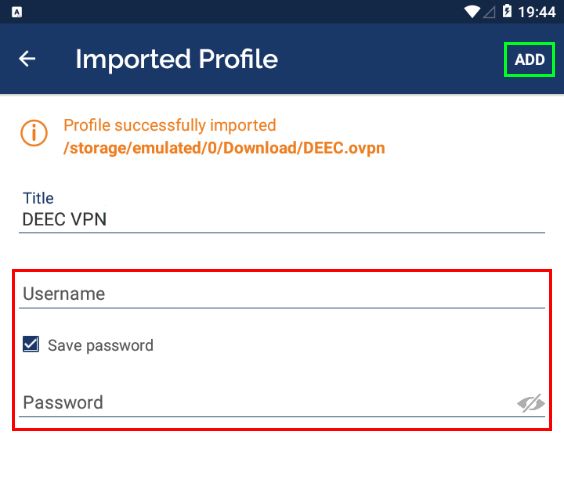
Go to the file directory, select it and do "Import".

To finish, you will have to insert the credentials obtained by the Management Office of the Computer Network and make "ADD".
To use this service you need a @deec.uc.pt account!
#### OpenVPN Installation, Configuration and Execution Manual on iOS
This document will present, step by step, the installation, configuration and execution of OpenVPN on the iOS operating system.
**Preparation:**
Before starting the installation and configuration of OpenVPN on your iPhone, you should check the following point:
- Have an account for configuring the VPN, which is requested at the Computer Network Management office.
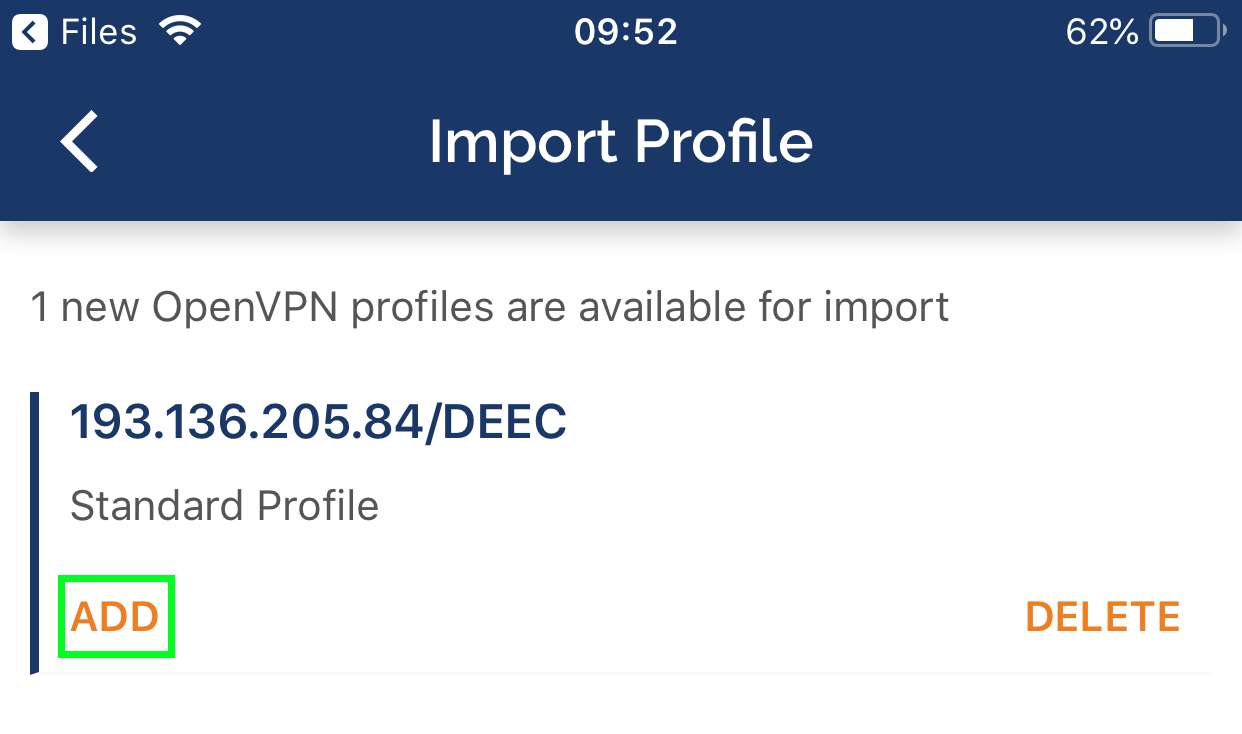
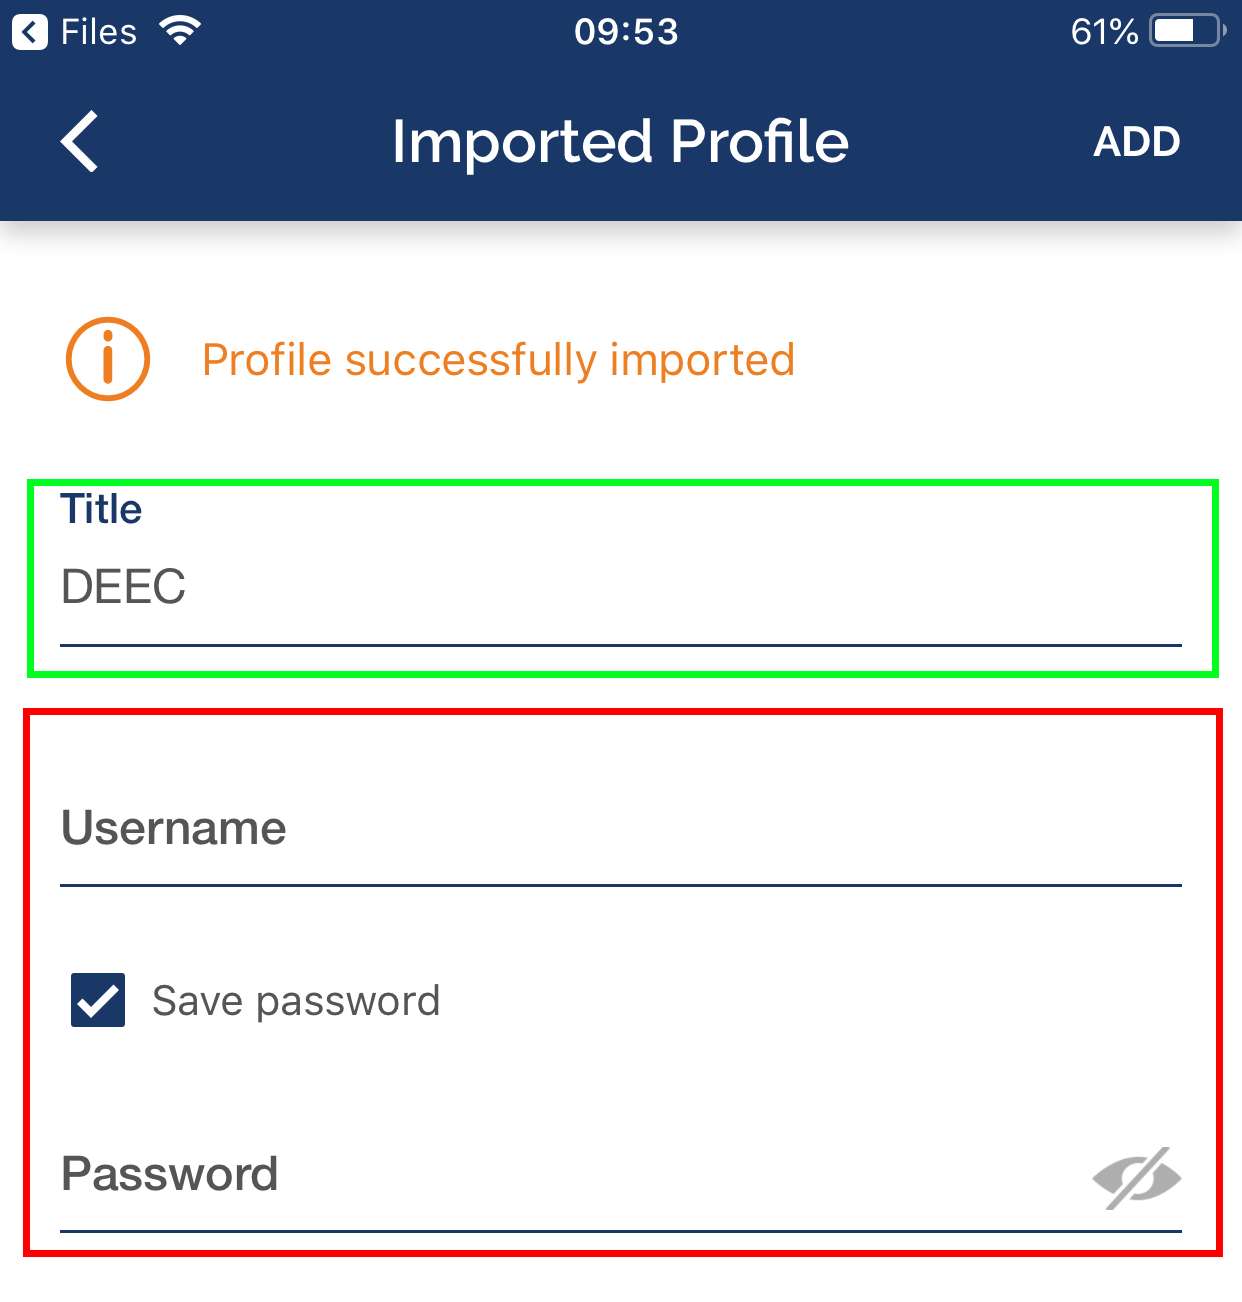
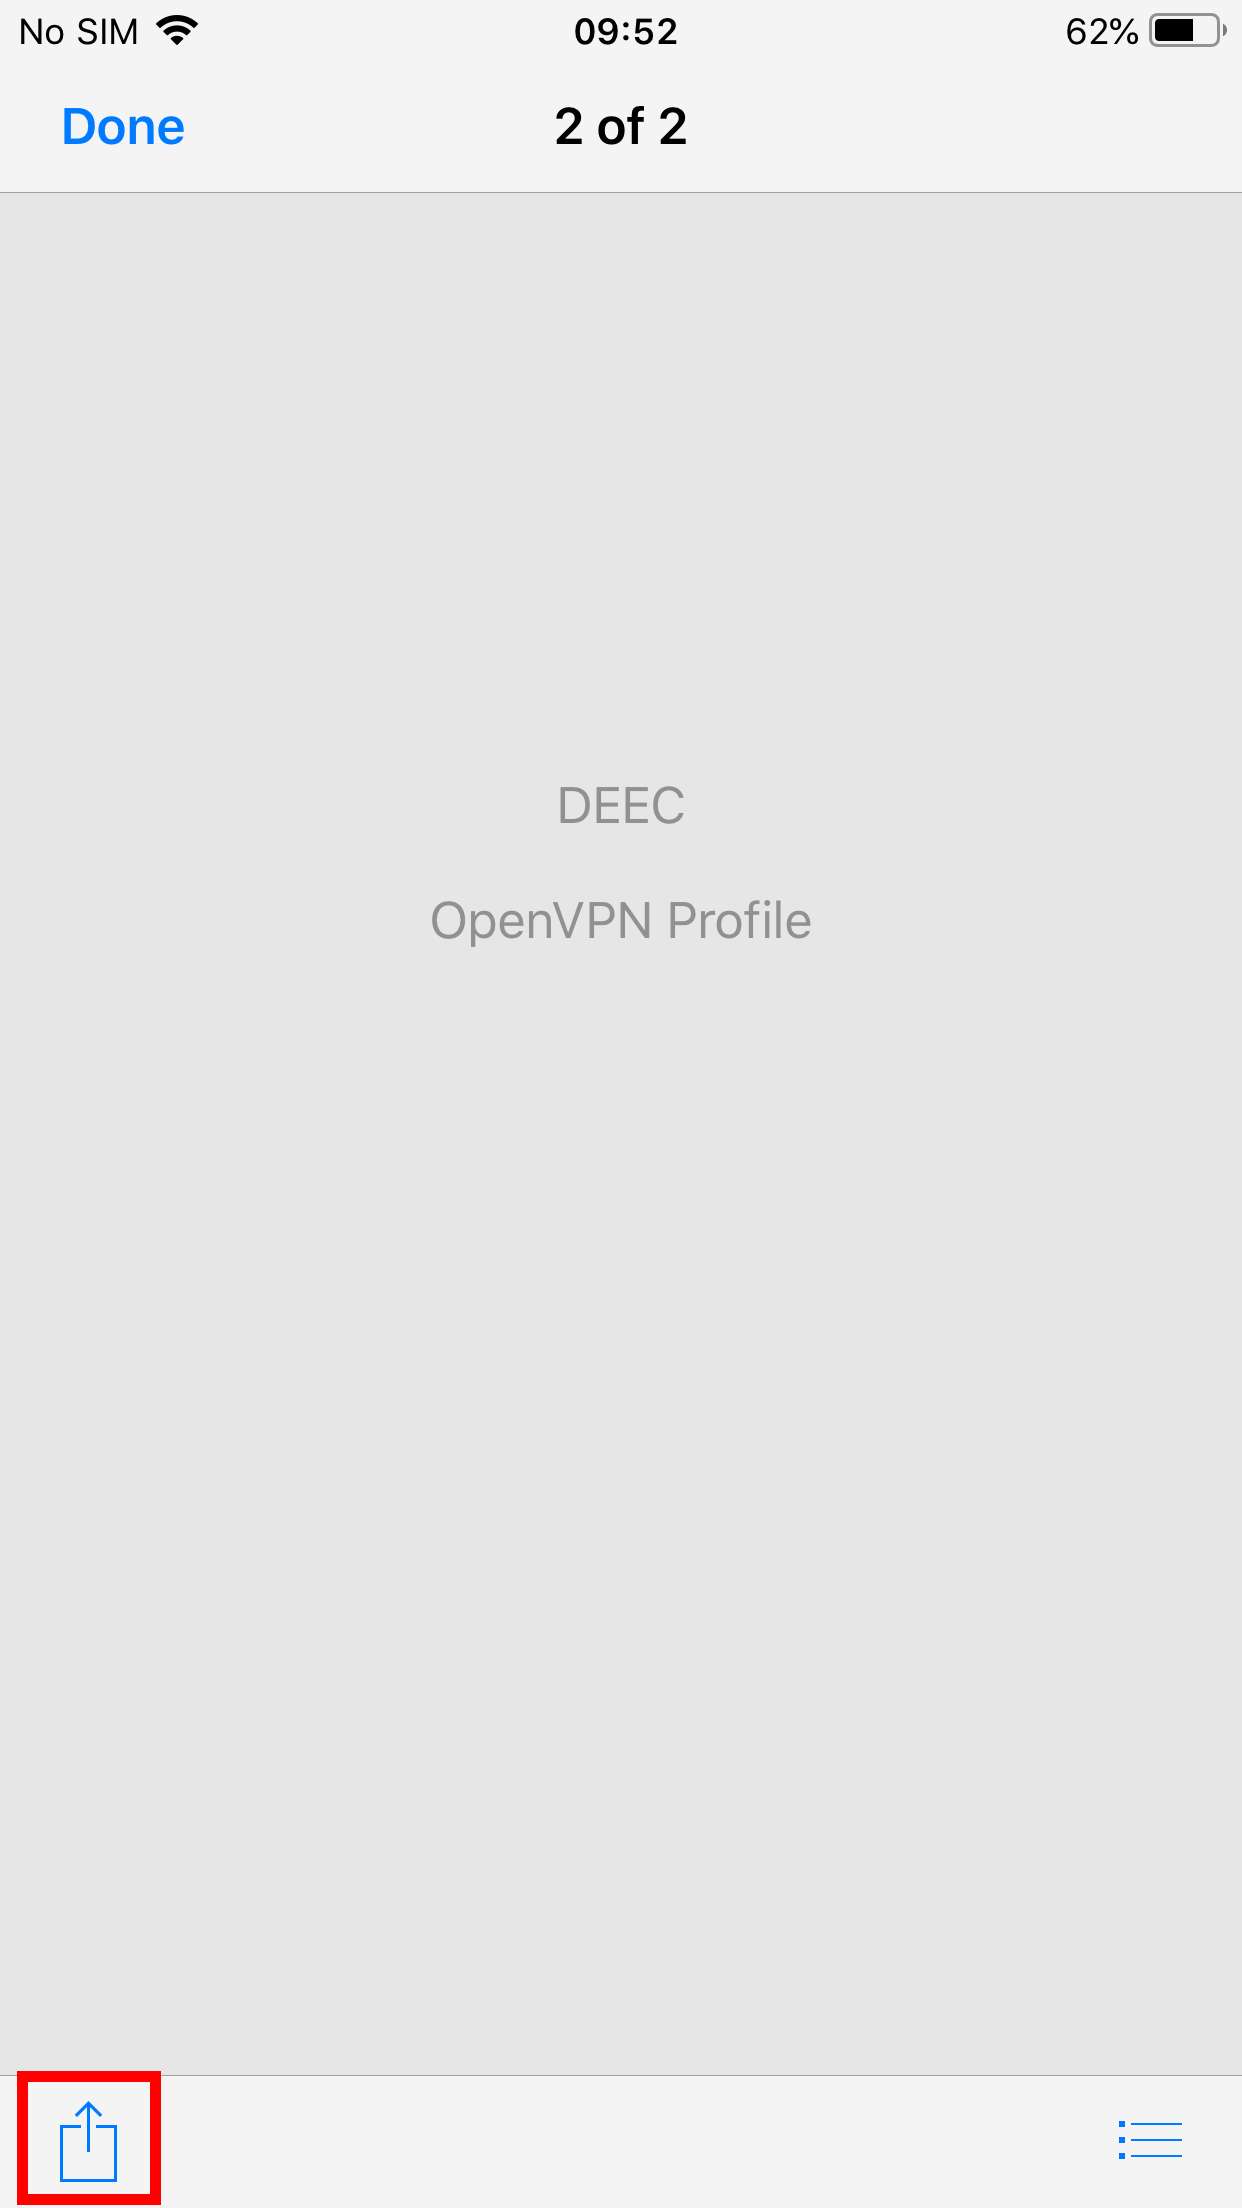
To add the ovpn file, just open the Files application, go to the downloaded file's directory and open it with OpenVPN.
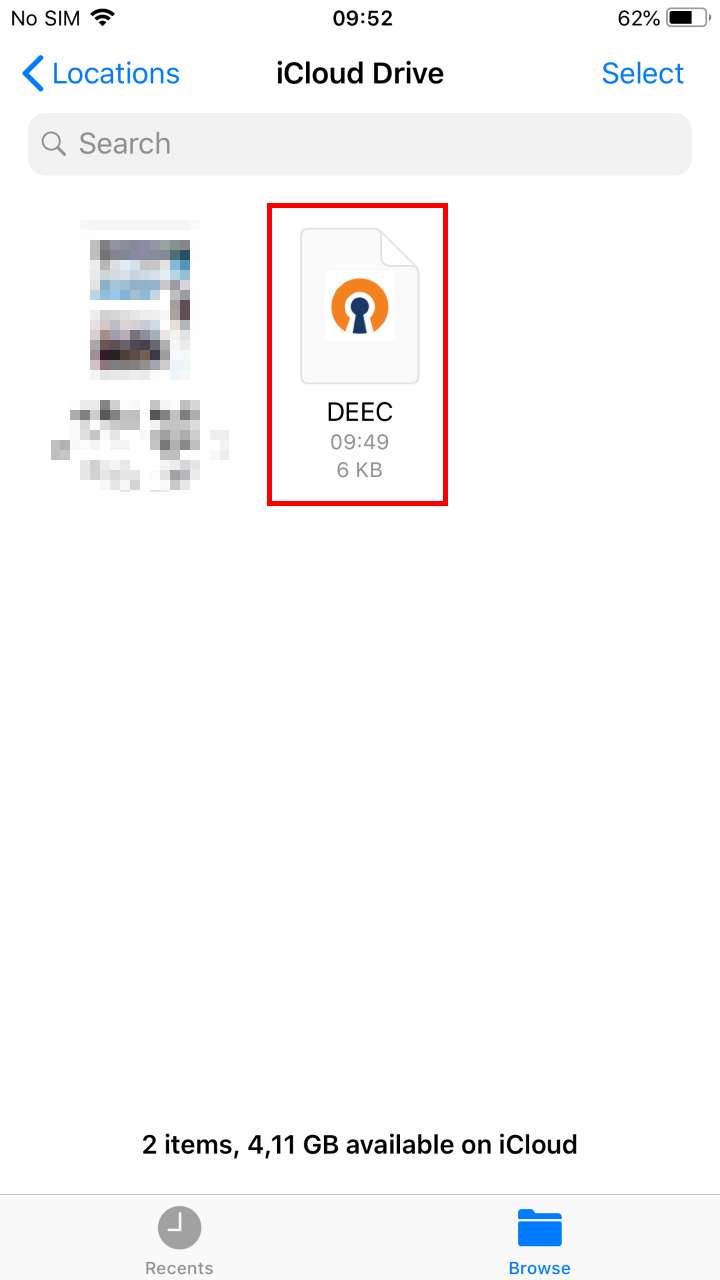
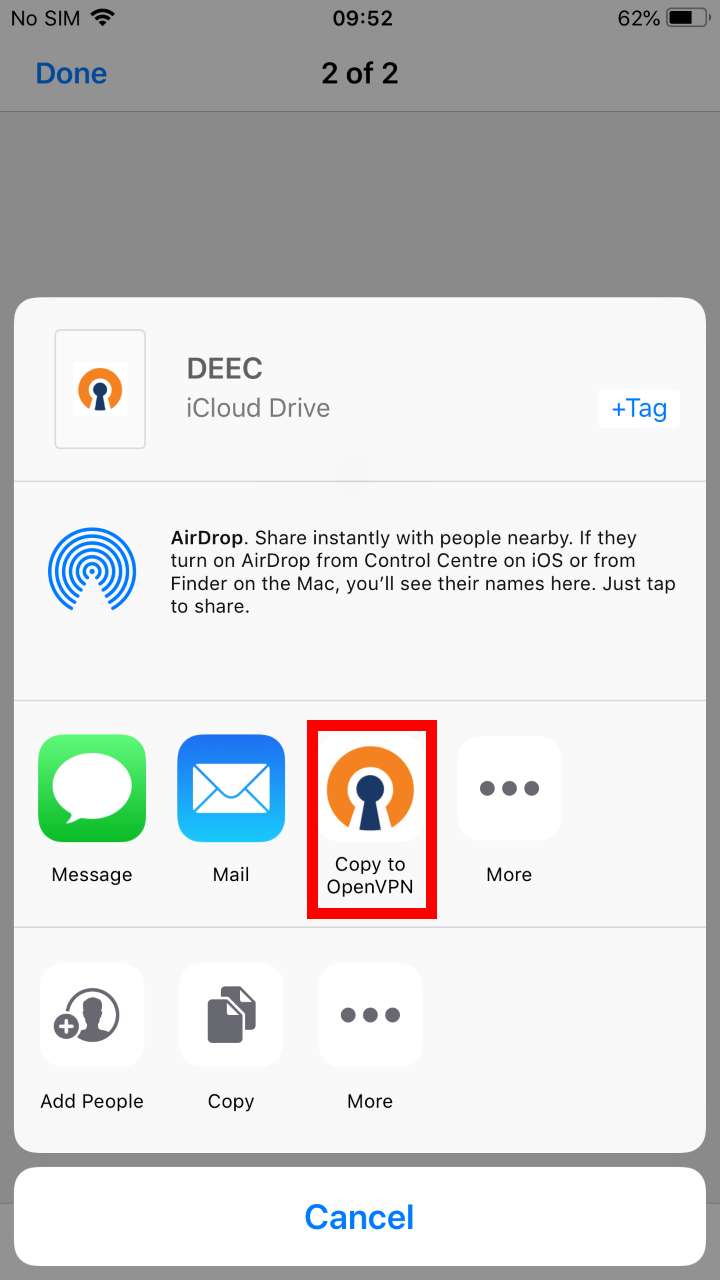
Finally, select “ADD” and enter the credentials and select “ADD” again. If you want, you can change the Title to an easier name to identify to the DEEC VPN.