# Printer Software Instalation for Linux
To use this service you need a @deec.uc.pt or @uc.pt account!
### Introduction
In this document, the installation of the printers in the locker room and cabinet 3A4 on Linux and Mac OS X using CUPS will be presented step by step.
To install the printer it is necessary to download the drivers [here](http://gofile.me/3Cvzn/nB8nE5opr "http://gofile.me/3Cvzn/nB8nE5opr").
### Installing the PaperCut client
### **Note:** You cannot print without the PaperCut client.
- **Linux**
Name: PCClient
Command: /opt/papercut/drivers/client/linux/pc-client-linux.sh

- **Mac OS X**
Run the installer **client-local-install** located in the “drivers\\client\\mac” folder int the ZIP file.
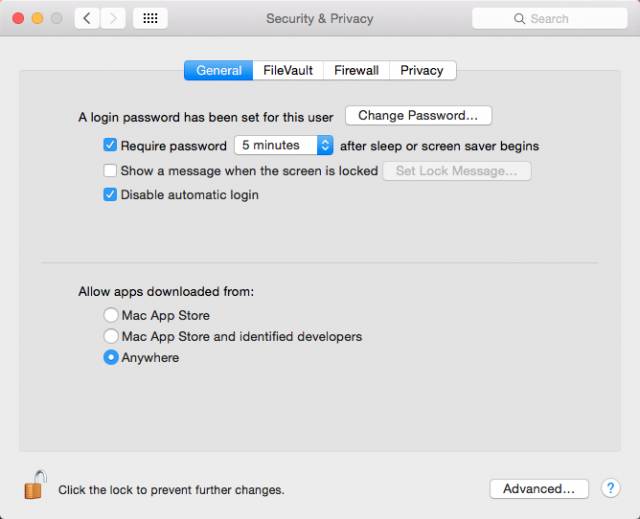
If you see the error “can’t be opened because it is from an unidentified developer.”, Go to System Preferences> Security & Privacy and under “Allow applications downloaded from:”, select “Anywhere”.
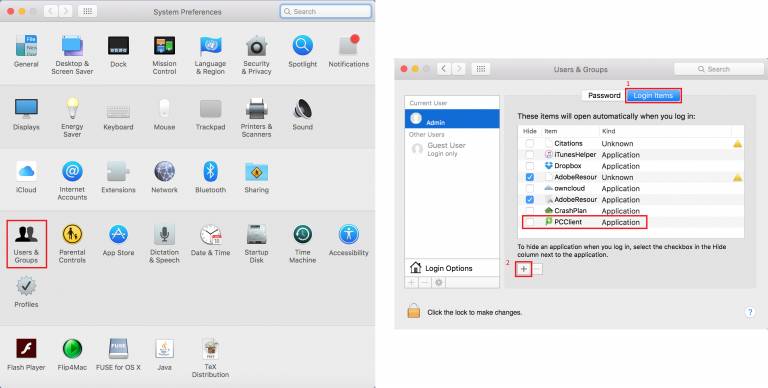
For the PaperCut client to start automatically with the operating system, it is necessary to go to System Preferences> Users & Groups and in “Login Items”, and add PCClient to the list (click on the “+”).
After installation, enter your DEEC credentials. 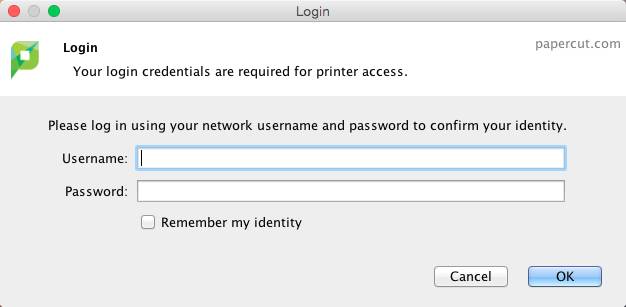
### **Installing the printer**
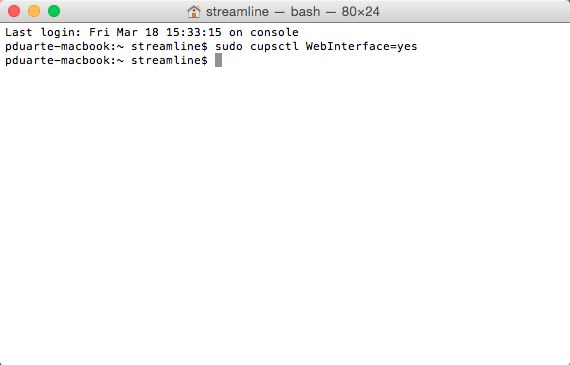
**1-** Open the Terminal and run the command “sudo cupsctl WebInterface = yes”:
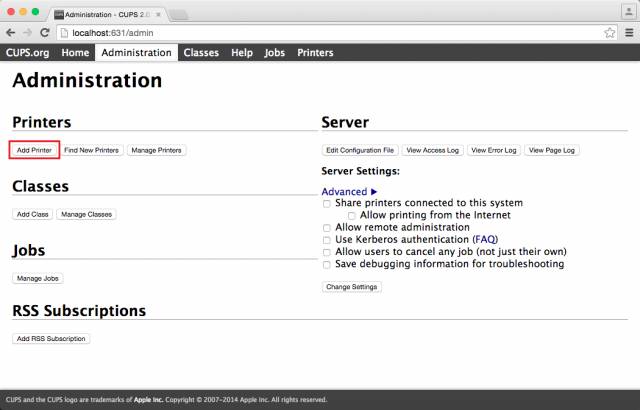
**2-** Through the browser access the address: http: // localhost: 631 /. Go to the “Administration” tab and “click on Add Printer”.
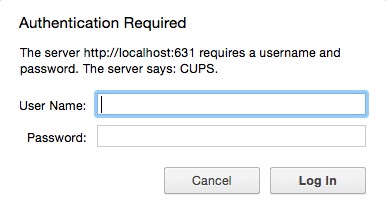
**3-** Enter your Mac's credentials.
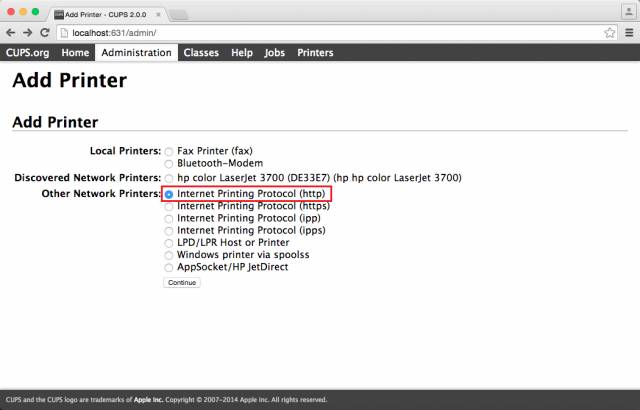
**4-** Select “Internet Printing Protocol (https)”.
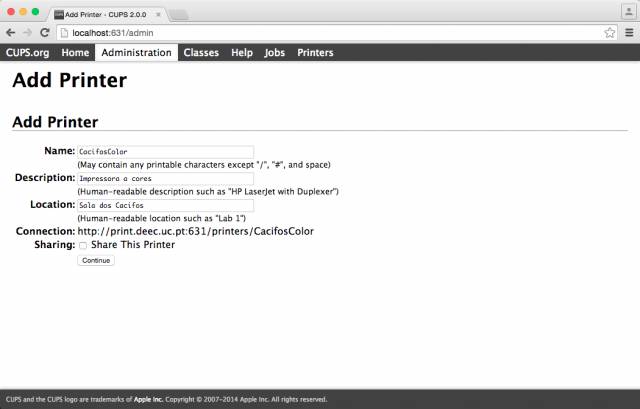
**5-** In the "Connection" field, enter the address of the printer you want to install:
- Color printer in the locker : [http://print.deec.uc.pt:631/printers/CacifosColor](http://print.deec.uc.pt:631/printers/CacifosColor)
- Black and white printer from the locker room: [http://print.deec.uc.pt:631/printers/CacifosGrayscale](http://print.deec.uc.pt:631/printers/CacifosGrayscale)
- Color printer in 3A4: [http://print.deec.uc.pt:631/printers/gab-3a4](http://print.deec.uc.pt:631/printers/gab-3a4)

**6-** Fill in the following fields:
**7-** Select in the Make field select the option Generic and then select the driver “Generic PostScript Printer (en)”:

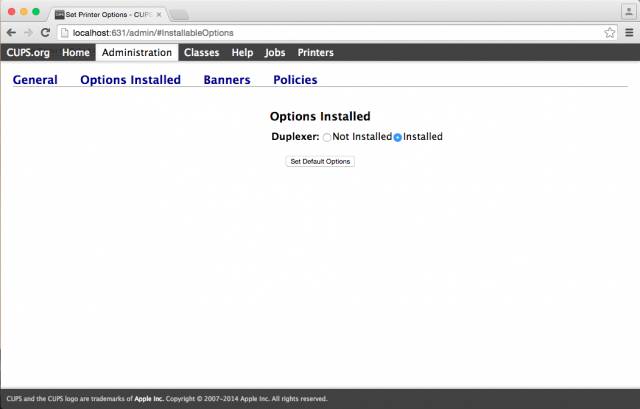
**8-** Open the Options Installed tab and in the Duplexer field, select the Installed option. Finally click on Set Default Options.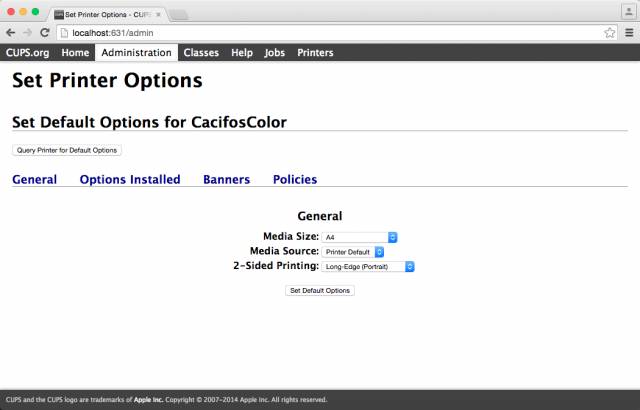
**9-** Abrir o separador Options Installed e no campo Duplexer, selecionar a opção Installed. Por fim clicar em Set Default Options.