# IT (English)
# E-mail
# Email Configuration
The generic parameters for configuring email clients for all email addresses with the domain @[co.it.pt](http://co.it.pt/ "http://co.it.pt") are as follows.
| **Protocol** | IMAP |
|---|
| **Server Name** | imap.co.it.pt |
|---|
| **Security** | SSL |
|---|
| **Port** | 993 |
|---|
| **Authentication Method** | *Password* (normal) |
|---|
| **User** | <your email> (for example, jferreira@co.it.pt) |
|---|
| ***Password*** | <your password> |
|---|
### Outgoing settings
| **Protocol** | SMTP |
|---|
| **Server Name** | smtp.co.it.pt |
|---|
| **Security**
| STARTTLS |
|---|
| **Port** | 587 |
|---|
| **Authentication Method** | *Password* (normal) |
|---|
| **User** | <your email> (for example, jferreira@co.it.pt) |
|---|
| ***Password*** | <your password> |
|---|
The webmail system is based on [Zimbra](http://www.zimbra.com/open-source "http://www.zimbra.com/open-source"), that has the following features:
- Self organizing folders
- Fast, advanced (in messages and attachments), writable, multi-folder searches
- Conversation view with multi-folder support
- Filters
- Full calendar
- Rich Web interface, multi-platform - browser and operating system
- Ubiquitous Access - Anywhere, Any Device
- Secure attachment access with no need for additional software
- Collaborative system based on modern technologies
You can access DEEC's webmail through [https://webmail.co.it.pt](https://webmail.co.it.pt/)
# Networks & Connectivity
# Eduroam Configuration
The Telecommunications Institute is covered by a wireless network, thus allowing transparent and fast access to the network and the Internet.
Two networks are available, whose names (SSID) are IT-Coimbra and EDUROAM. The IT-Coimbra network has local addressing common to the wired IT network, allowing access to the resources there (for example, printers). The EDUROAM network is integrated into the European network, so it only allows access to the Internet and not to local resources. Both are configured in the same way, which will be described below.
Regarding technical specifications, the definitions to be used for network access are as follows:
| **Definition** | | **Value to set** |
|---|
| Wireless Type | Types of wireless networking technology that supports wireless networking | 802.11 a/b/g/n
Bandwidth up to 900Mbps per space
Support for 2.4GHz and 5GHz frequencies |
| SSID | Wireless Network Name | IT-Coimbra / EDUROAM |
| Wireless Protection | Wireless Encryption System Type | WPA 2 (AES/CCMP, Dynamic) |
| Authentication
(802.1X) | Method of authenticating a device / user to a protected network | EAP-PEAP + MSCHAPv2 |
| Certificate Validation | Digital Certificate Verification and Validation System | Do not check / Disabled |
| Login | Login of the user who wants to connect to the network | Email address with the format @it.uc.pt (for example, user@it.uc.pt )
|
| Password | Password of the user who wants to connect to the network | Password of the respective account |
In case of difficulty, you can contact the Helpdesk service, through the helpdesk@co.it.pt address.
# Security
# Authentication and Account Password
IT has a centralized authentication system, that is, a unique identification system, which allows all its users to access the various informed services, using the same authentication credentials - the same username and password.
Given the degree of criticality of this keyword, which allows access to multiple computer services, were used according to the following rules:
- A keyword must have at least eight characters and three different variants (uppercase, lowercase, numbers and punctuation);
- The password must be renewed periodically by the user;
You can change your password at [https://password.co.it.pt](https://password.co.it.pt/)
# VPN
# OpenVPN
OpenVPN offers a flexible VPN solution to ensure the security of communications data, whether to guarantee privacy on the Internet or remote access by employees to the internal resources of organizations.
# VPN installation manual on windows
### OpenVPN Installation, Configuration and Run Guide on Windows
### **Introduction:**
This document will present, step by step, the installation, configuration and execution of OpenVPN on the Windows operating system.
**Preparation:**
Before starting the installation and configuration of OpenVPN on your computer, you should check the following point:
- Have an account for the configuration of OpenVPN, which is requested from the Management Office of the Computer Network.
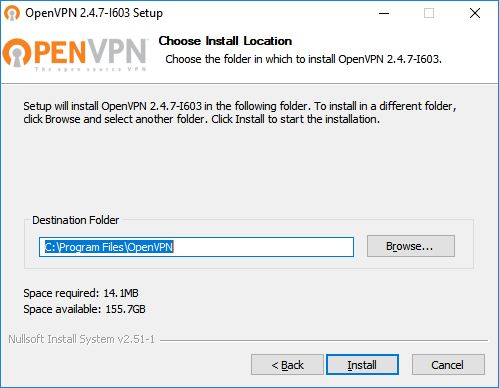
### **Installation:**
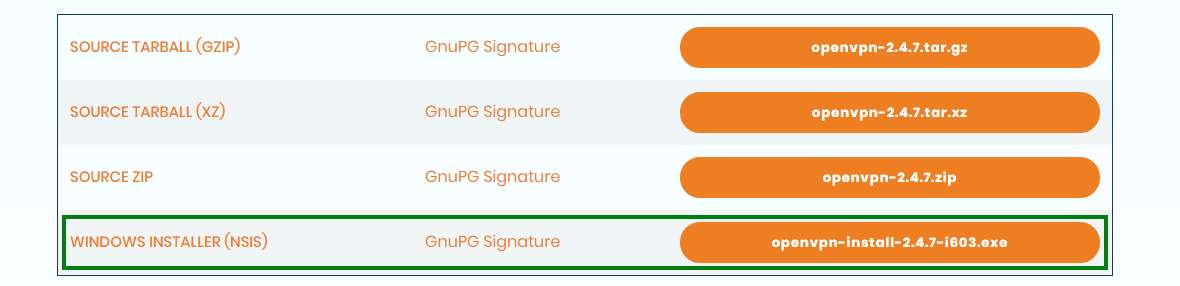
To download OpenVPN just go [here](https://openvpn.net/community-downloads/ "https://openvpn.net/community-downloads/"), and below you will find the respective download.
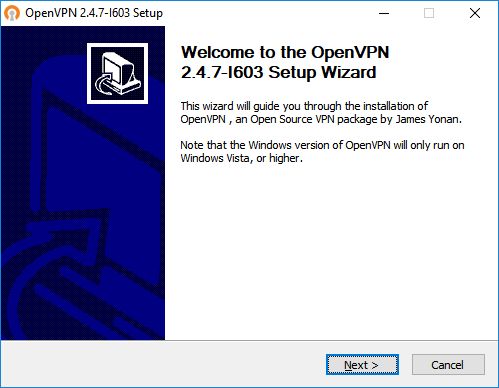
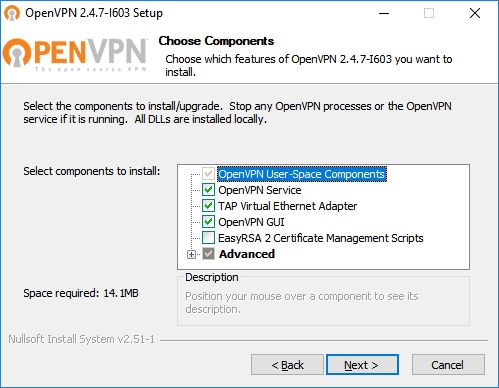
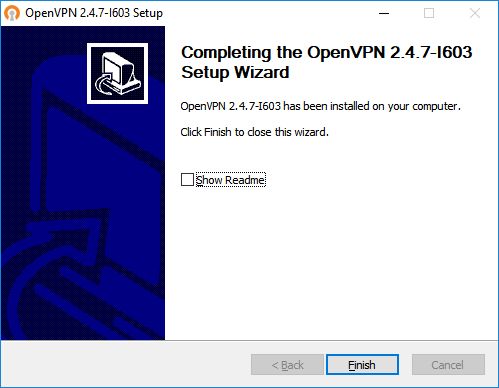
Then, perform the respective installation.
### **Configuration:**
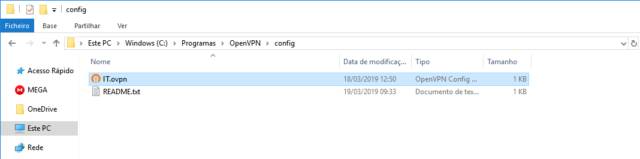
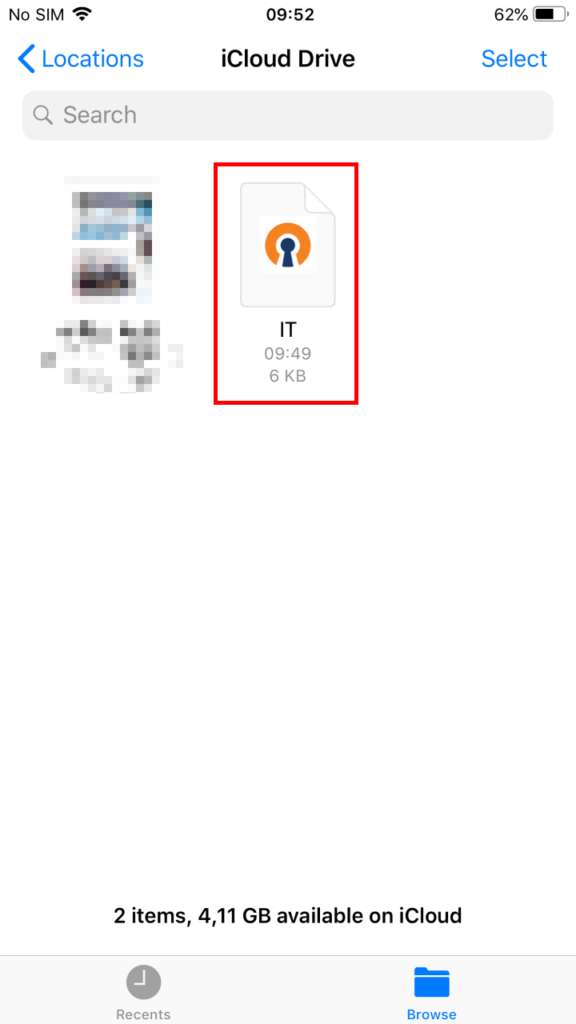
For your configuration, you should download [IT.ovpn](https://kb.deec.uc.pt/attachments/25) e movê-lo a “**C:\\Program Files\\OpenVPN\\config**”.
### **Execution**
To finish, you will have to start the program “OpenVPN GUI” which, with its execution, will show an icon of a monitor with a lock on your task bar.

With the right side of the mouse over the icon, click on Connect and enter the credentials obtained by GRI.
This document will present, step by step, the installation, configuration and execution of OpenVPN on the Ubuntu operating system.
Before starting the installation and configuration of OpenVPN on your computer, you should check the following point:
Have an account for the configuration of OpenVPN, which is requested from the Management Office of the Computer Network.
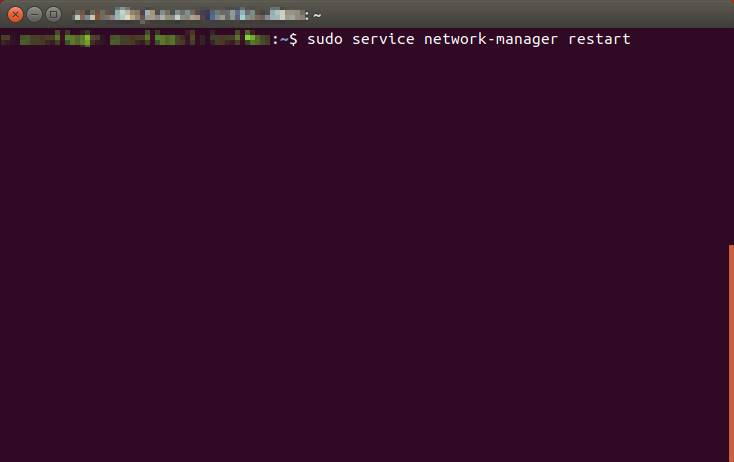
When the installation is complete, restart the network-manager service.
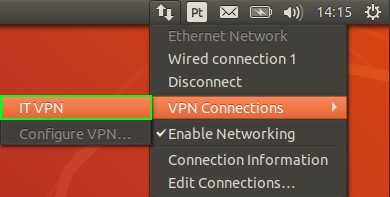
Finally select the network manager icon, go to VPN Connections and select the created VPN.
OpenVPN Installation, Configuration and Execution Manual on Android
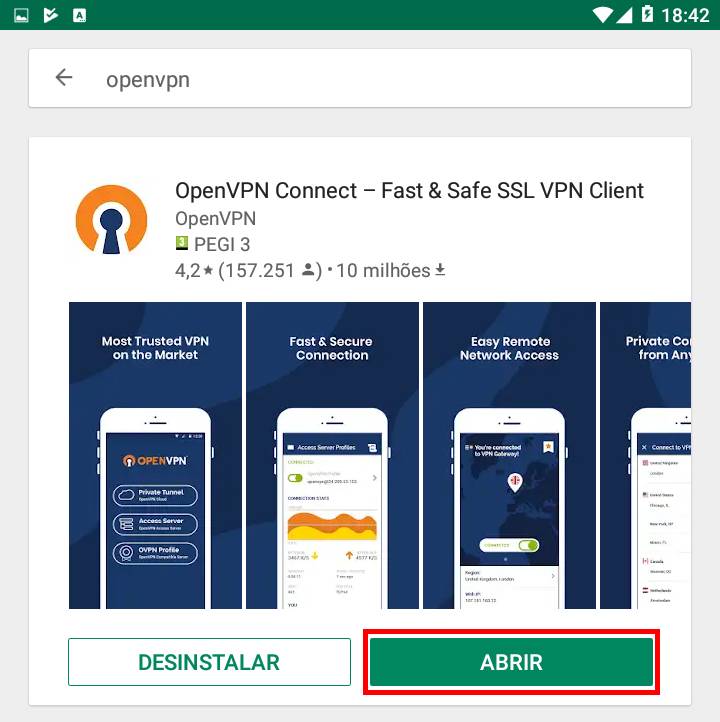
This document will present, step by step, the installation, configuration and execution of OpenVPN on Android operating systems.
Before starting the installation and configuration of OpenVPN on your SmartPhone, you should check the following point:
-
Have an account for the configuration of OpenVPN, which is requested from the Management Office of the Computer Network
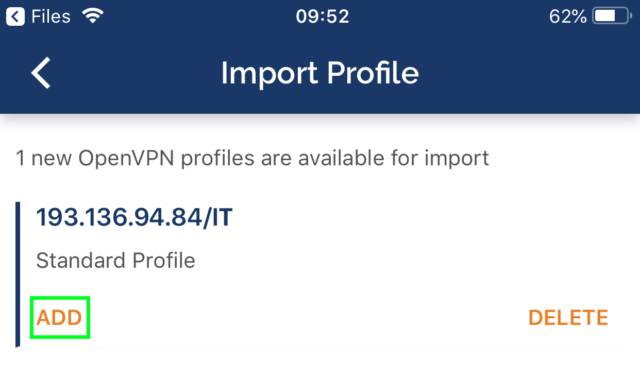
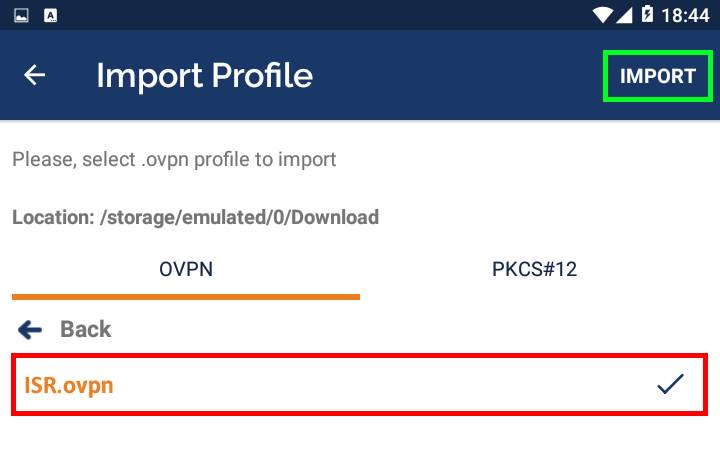
Go to the file directory, select it and do "Import".
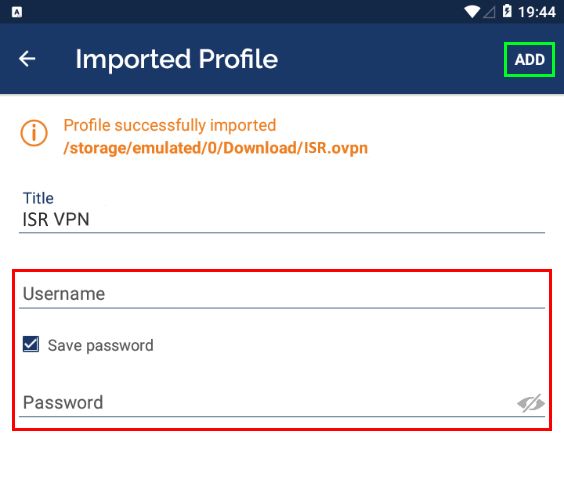
To finish, you will have to insert the credentials obtained by the Management Office of the Computer Network and make "ADD".
- Have an account for configuring the VPN, which is requested at the Computer Network Management office.
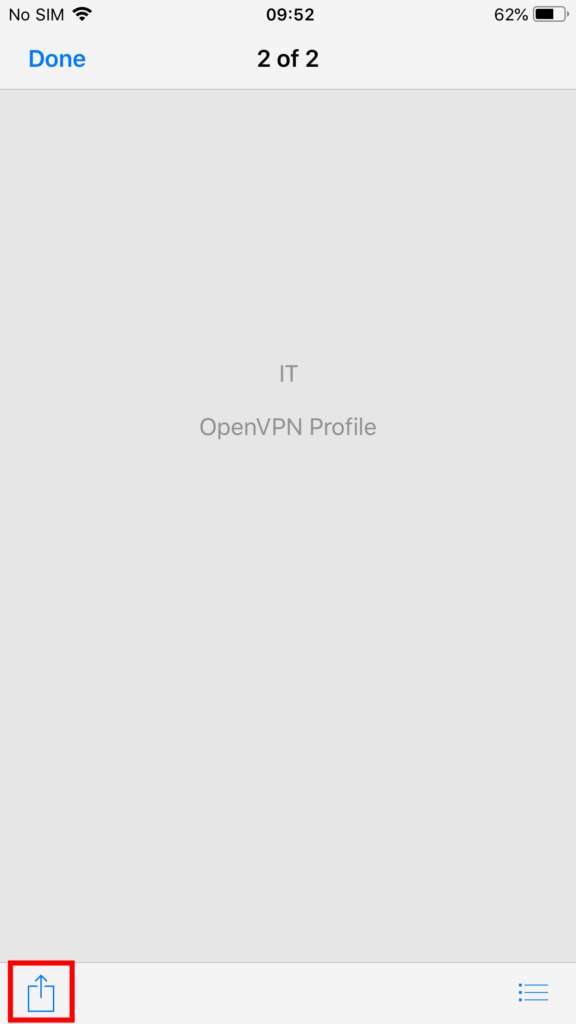
To add the ovpn file, just open the Files application, go to the downloaded file's directory and open it with OpenVPN.
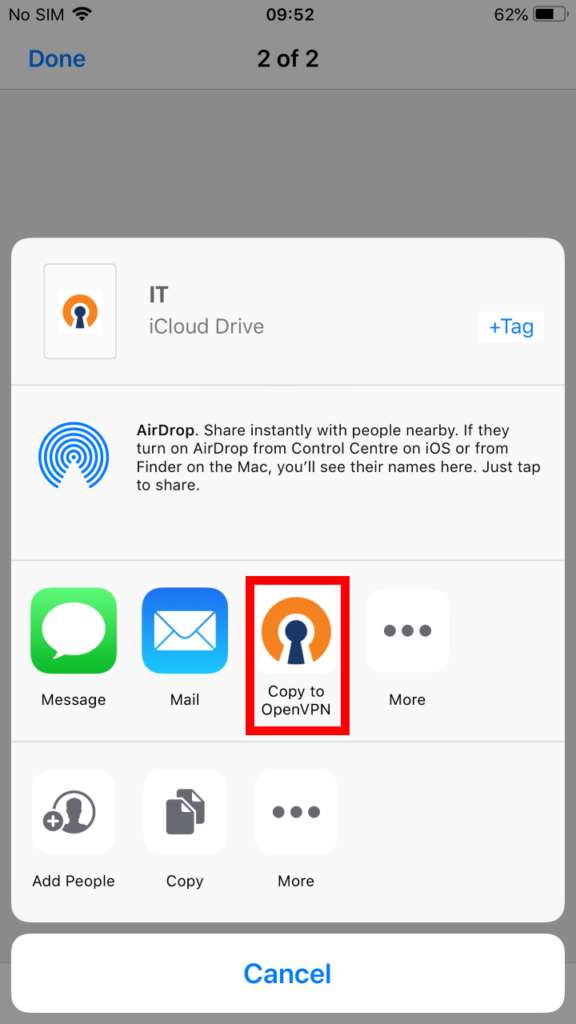
Finally, select “ADD” and enter the credentials and select “ADD” again. If you want, you can change the Title to an easier name to identify to the IT VPN.