Setup DEEC Wi-Fi in Windows 7
To use this service you need a @deec.uc.pt or @uc.pt account!
DEEC Network Installation Guide on Windows 7
Introduction
In this document you will be presented step by step the installation of DEEC Wireless Network.
In the images in this document DEEC-Labs should be replaced by DEEC.
Windows 7
Go to "Start Menu", "Control Panel", "Network and Internet", "Network and Sharing Center":
Then click on “Set up a new connection or network”: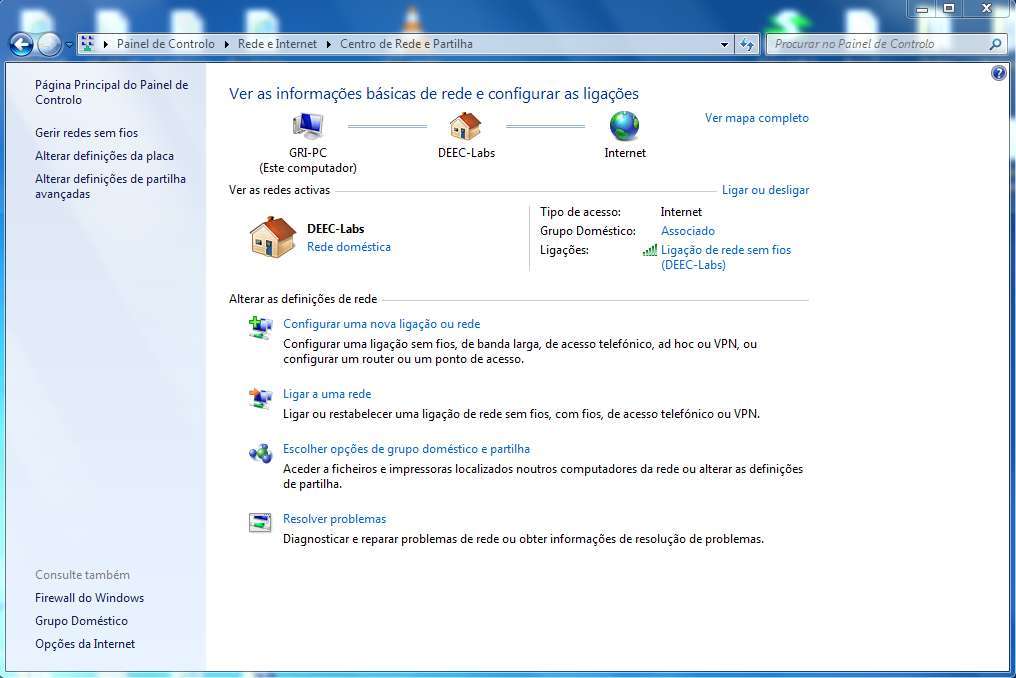
Then click on “Set up a new connection or network”:
Then click on “Manually connect to a wireless network”:
The fields must be completed, according to the following image:
Attention, the "Network Name" is case sensitive.
Attention, the "Network Name" is case sensitive.
On the next page, go to “Change Connection Settings”:
The configuration to be made in the "Connection" and "Security" tab is explicit in the two images below:
On the “Security” tab, “DEEC Wireless Network Properties”, “Settings”, you should uncheck “Validate Server Certificate”:
In turn go to “Configure” and uncheck “Automatically use login name (…)”:
Finally, you only need to enter your user credentials in the DEEC.UC.PT domain:
No comments to display
No comments to display